
- Published on
Spring Cloud Gateway — Resource Server with Keycloak RBAC

- Authors
- Name
- Amrut Prabhu
- @amrutprabhu42

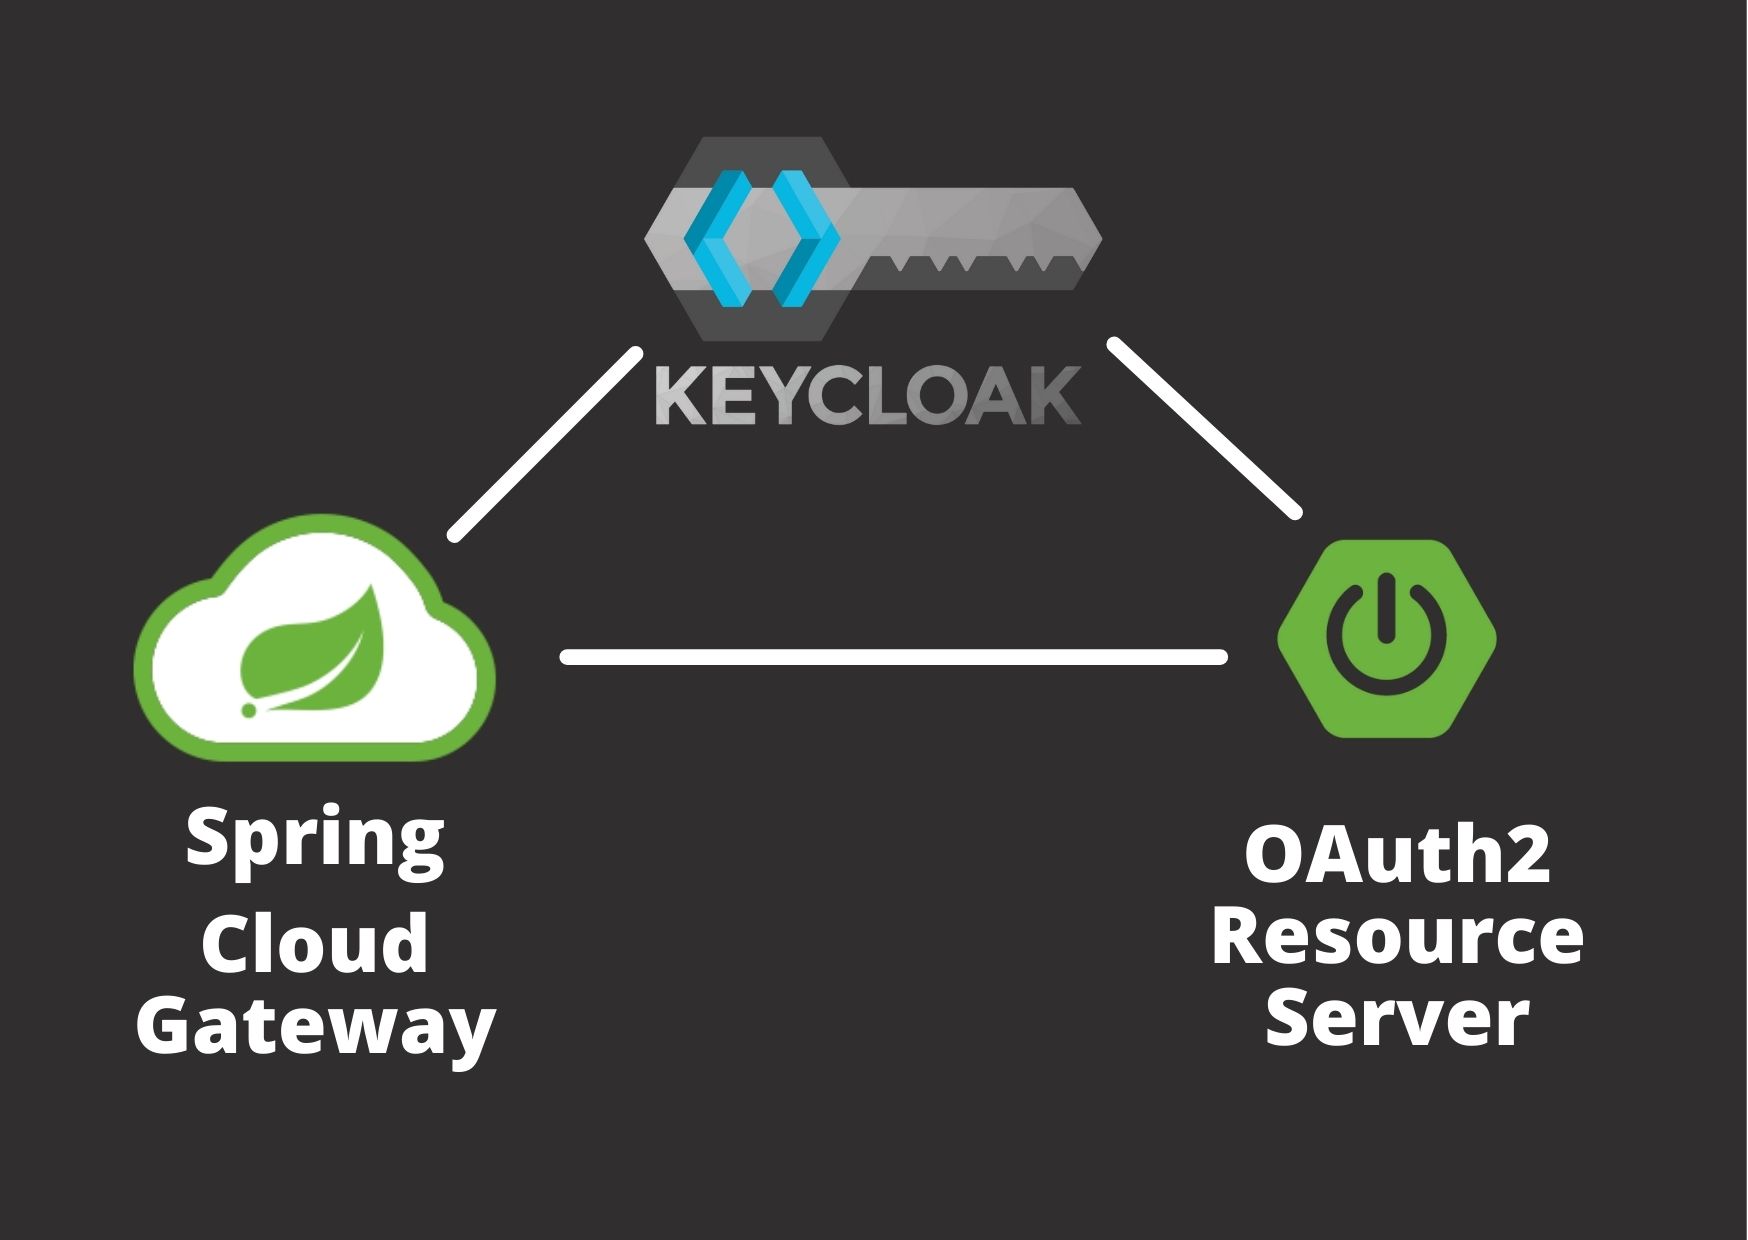
In this article, we will be exploring how we can integrate a resource server with an API gateway that is integrated with Keycloak and enable role-based access control (RBAC).
Introduction
In my previous article “Spring Cloud Gateway Keycloak OAuth2 OIDC Integration”, I have shown how we can integrate Keycloak with Spring Cloud Gateway. Now in this article, we will extend this further to integrate a resource server, such that a client(e.g browser) can access a resource only when he has the correct role to access the resource on the server. This is a continuation of the previous article Spring Cloud Gateway Keycloak OAuth2 OIDC Integration, So I recommend reading it.
So let’s get started.
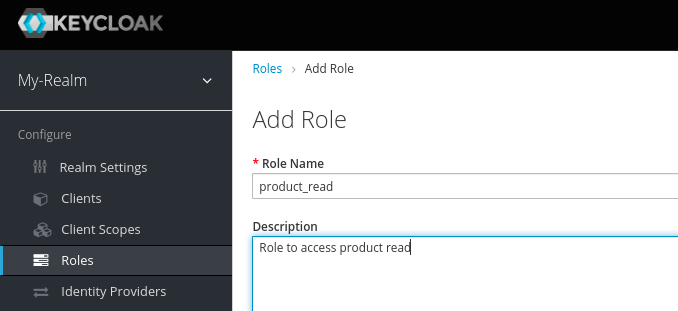
Adding a custom keycloak role to the user.
Let’s add a role to the user in order to allow it to access the resource server.
For this, we will go to our realm and under the roles section and create a role called “product_read”.

Once the role is created, we will then assign this role to our “test” user. To do that, go to the “Users” section and then select the user “test”. Once you are in the user's settings, go to the “Role Mappings” tab and add the role to the user as follows.

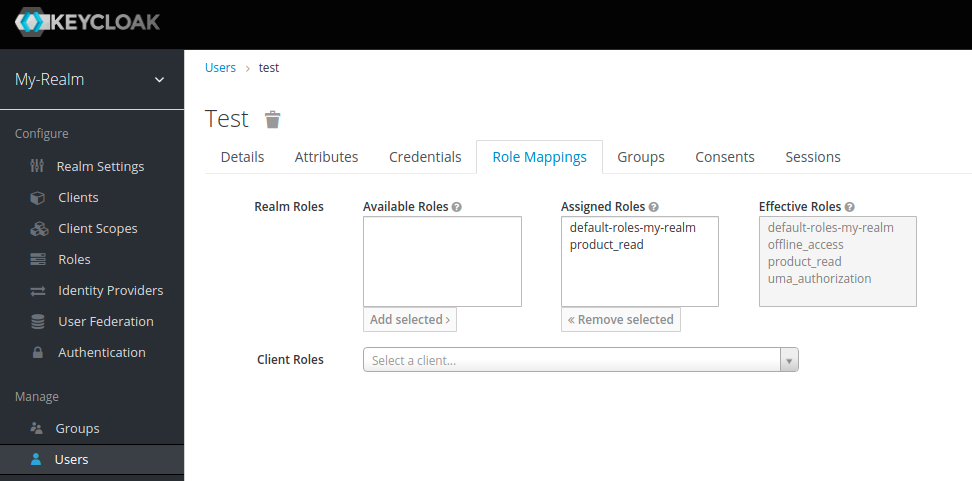
We can remove the default roles that are already present, but I would leave them for now.
With this, we are done with allowing the user “test” to access the product resource from the Keycloak side.
Now Let’s create the resource server.
Creating a Resource Server
Since we already have the code for the gateway application we will use the same and add a resource server to it. If you haven’t read my previous article, then you can directly use the API Gateway code from my Github repo.
To create the resource server, let's go to https://start.spring.io and create an application called “product-service” with the following dependencies.
- OAuth2 resource server
- Spring Web
Once you generate and download the project, we will create a simple RestController that provides access to product resources.
@RestController
public class Controller {

    @GetMapping("/product")
    @RolesAllowed({"product_read"})
    public String getProduct(Principal principal) {
        return "Response from Product Service, User Id:" + principal.getName();
    }
}
Here I am protecting the GET call with the “product_read” role which we had created in Keycloak. This means that the user can access the resource only if it has the role “product_read”.
Next, We will add some properties to application.yaml
spring:
  security:
    oauth2:
      resourceserver:
        jwt:
          jwk-set-uri: http://localhost:8080/auth/realms/My-Realm/protocol/openid-connect/certs

server:
  port: 9191
We can get this JWK URI from the “OpenId Connect Configuration” on the realm settings page. This JWK URI is required to validate the JWT token that comes in with the request.
Next, let’s set up the security configuration.
@Configuration
@EnableWebSecurity
@EnableGlobalMethodSecurity(jsr250Enabled = true)
public class ResourceServerConfig extends WebSecurityConfigurerAdapter {

   @Override
   protected void configure(HttpSecurity http) throws Exception {
      http
         .authorizeRequests()
            .anyRequest().authenticated()
         .and()
            .oauth2ResourceServer()
              .jwt(jwt -> jwt.jwtAuthenticationConverter( jwtAuthenticationConverter()));
   }

   private Converter<Jwt, ? extends AbstractAuthenticationToken> jwtAuthenticationConverter() {
      JwtAuthenticationConverter jwtConverter = new JwtAuthenticationConverter();
      jwtConverter.setJwtGrantedAuthoritiesConverter(new RealmRoleConverter());
      return jwtConverter;
   }
}
Here, we have added the@EnableGlobalMethodSecurity annotation, to enable method-level security in our application.
We then create a custom authorities converter. This converter will take out the keycloak roles (that are set as claims) from the JWT token and set them as authorities in spring security for role-based access.
Let’s look at the converter code.
public class RealmRoleConverter implements Converter<Jwt, Collection<GrantedAuthority>> {
    @Override
    public Collection<GrantedAuthority> convert(Jwt jwt) {
        final Map<String, List<String>> realmAccess = (Map<String, List<String>>) jwt.getClaims().get("realm_access");
        return  realmAccess.get("roles").stream()
                .map(roleName -> "ROLE_" + roleName)
                .map(SimpleGrantedAuthority::new)
                .collect(Collectors.toList());
    }
}
In this converter, we extract the “realm*access” claims and then convert them to roles, using the ROLE* as a prefix. Spring security requires this prefix to interpret them as roles.
Why do we need this converter?
To answer this question, let’s look at the decoded JWT token.

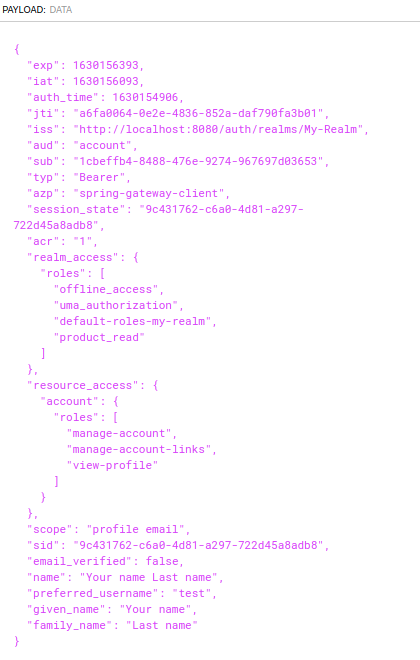
The JWT payload has two parts, the “realm_access” and the “scope”. By default, the OAuth2 resource server JWT converter uses the “scope” claims. But these claims are part of the client scope i.e the client that was used in the API Gateway. If you go to the “Client Scopes” section in the client’s setting in Keycloak, you would find these scopes.
So we use the converter to extract the realm roles and use them as authorities in our spring application.
With all of this, we are done with creating the resource server.
Now, to connect it to the API Gateway application, we would have to make some changes to the API Gateway. Let’s have a look at that.
Connecting Resource Server to API Gateway
To connect the product service resource server, We will add a route to the properties file of the API Gateway.
spring:
  cloud:
    gateway:
      default-filters:
        - TokenRelay
      routes:
        - id: product-resource-service
          uri: http://localhost:9191
          predicates:
            - Path=/product/**
Here we are setting a route for any path request matching /product will be directed to the resource server (product-service) that is running at localhost at port 9191.
In the "default-filters" section, we would have to add “TokenRelay”, so that the API Gateway passes the JWT access token to the resource server.
With these properties, we are set to now run both the applications, i.e the API gateway and the product service.
Running the Applications
You can start the API Gateway and product service application using the commands.
java -jar target/spring-cloud-gateway-keycloak-oauth2-0.0.1-SNAPSHOT.jar

java -jar target/product-service-0.0.1-SNAPSHOT.jar
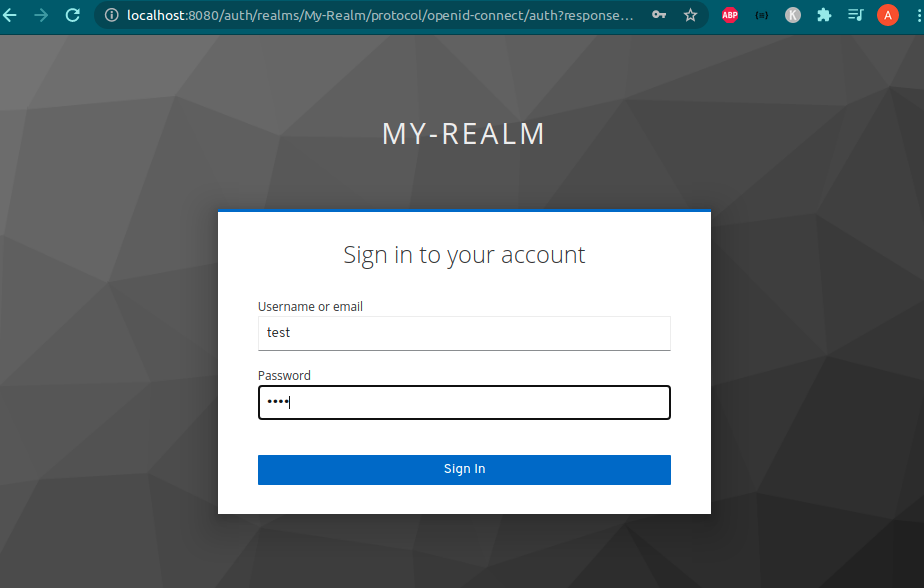
The API Gateway runs at 9090 and the product service runs at 9191. Now let's go to the browser and call the following URL localhost:9090/product. On accessing the product resource from the API Gateway, we are redirected to the keycloak login page which is running at 8080. Use the username and password “test” and log in.

Once you log in, you get the response from the resource server containing the User Id from Keycloak.


Conclusion
In this article, we integrated a resource server with Spring Cloud Gateway application. We also Integrated Keycloak’s OAuth2 OpenId Connect (OIDC) for authentication in the API Gateway and also performed a role-based access control (RBAC) inside the resource server with the JWT token sent from the API Gateway.
I have uploaded the entire code integrating Keycloak, API Gateway, and resource server to my Github repo.
I keep exploring and learning new things. If you want to know the latest trends and improve your software development skills, then subscribe to my newsletter below and also follow me on Twitter.
Enjoy!!