
- Published on
Spring Cloud Gateway Keycloak OAuth2 OIDC Integration

- Authors
- Name
- Amrut Prabhu
- @amrutprabhu42

In this article, we would be looking at how we can integrate Keycloak with Spring Cloud Gateway using the OAuth2 OpenId Connect (OIDC).
Introduction
Keycloak is an open-source application, which provides identity and access management. It is sponsored by Redhat, whose commercial product is Red Hat Single Sign-On (RH-SSO) based on Keycloak.
Keycloak supports various features out of the box like user registration, social media logins, 2-factor authentication, LDAP integration, etc. Apart from its various integration, it also provides some easy ways to customize user login UIs, forgot password options, email login options, etc with just a click of a button. You can read more about this in their documentation here
Understanding Keycloak Concepts
Now to understand Keycloak, we need to know some key concepts. Let’s have a look at that.
When you log in for the first time you would land up in a master realm.
What is a realm?
A realm is a holder of users and applications belonging to a single identity and access management. You can create multiple realms to handle multiple identities and access management. These custom reals are managed by the master real which is the admin realm for Keycloak.

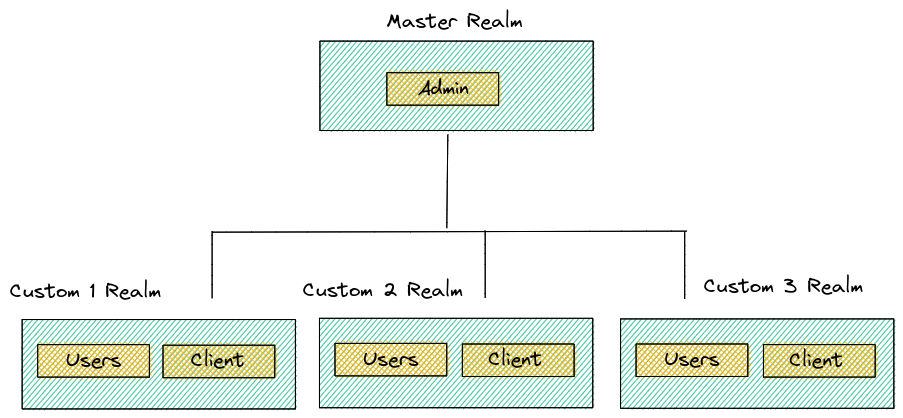
The applications in one realm cannot access users of another realm. Here we refer to the applications as the clients who want to access some user details.
With this, let's create a custom realm to handle our users.
Setting up Keycloak
To start Keycloak, you can start it as a standalone application by downloading the binary or you can use the Keycloak docker image. Today we will be using the docker image to start the application. I have created a simple Keycloak docker-compose file to start Keycloak and expose its port at 8080
version: '3.1'
services:
  keycloak:
    image: quay.io/keycloak/keycloak:15.0.1
    ports:
      - '8080:8080'
    environment:
      - KEYCLOAK_USER=admin
      - KEYCLOAK_PASSWORD=admin
Now, you can start Keycloak using docker-compose up.
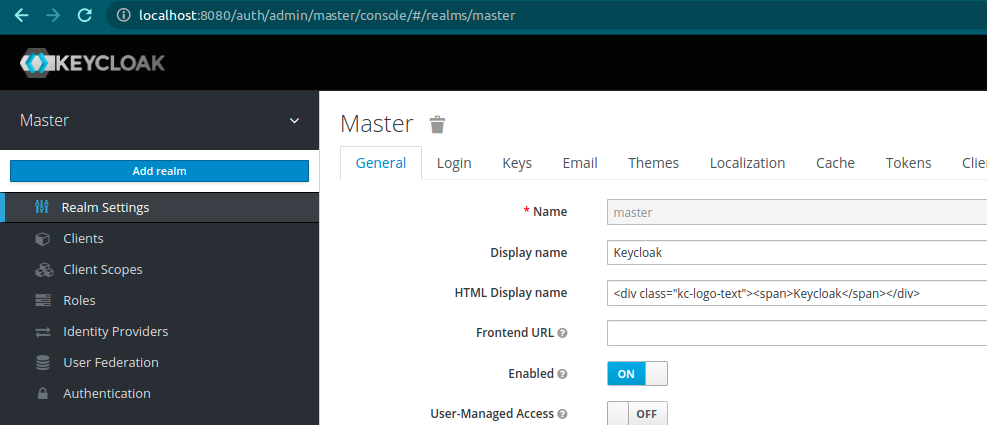
Next, open the page at http://localhost:8080 click on “Administration Console” and log in using “admin” as the user and password(as set in the environment variables above). Once you log in, you are already in the master realm.
Let’s create a new realm. Click on the master realm on the left side and then click add realm as shown in the picture.

Now, Give it a name, I have given it as “My-Realm”

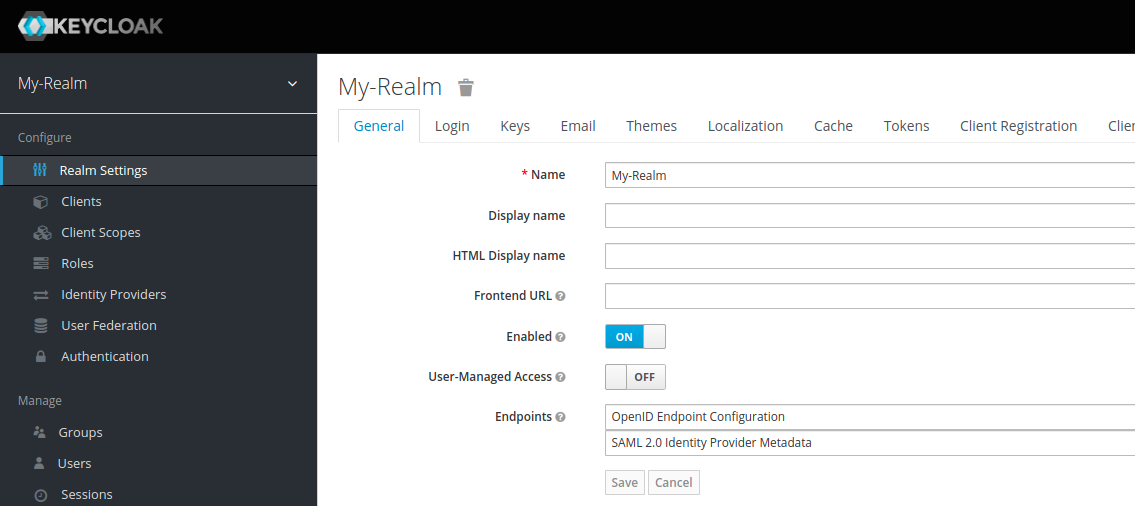
Now, we would be using all the default settings here.
Next, let's create a client in the “Clients” section. We will use this client to communicate with Keycloak from our Spring Cloud Gateway application.

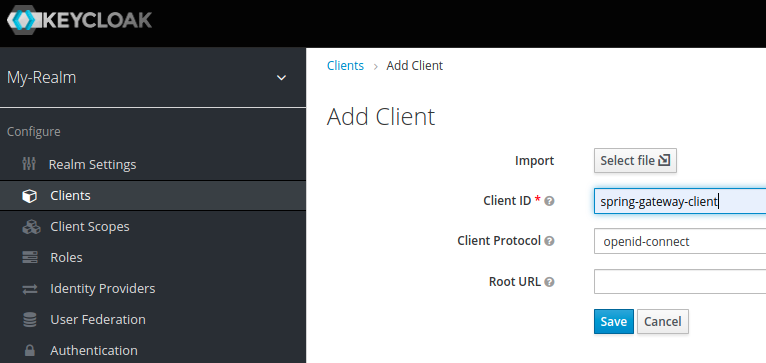
Here we give it a client id “spring-gateway-client” and keep the client protocol as “OpenID-connect” and click save.
Next, we will keep the “Standard Flow Enabled” option ON which allows us to use the OAuth2 mechanism. Also, we will set the “Access Type” to “confidential”, set a “Valid redirect URI” to “http://localhost:9090/login/oauth2/code/keycloak” and can leave the rest of the default settings and save this configuration. The redirect URI refers to our Spring Cloud Gateway application, which will run at 9090.

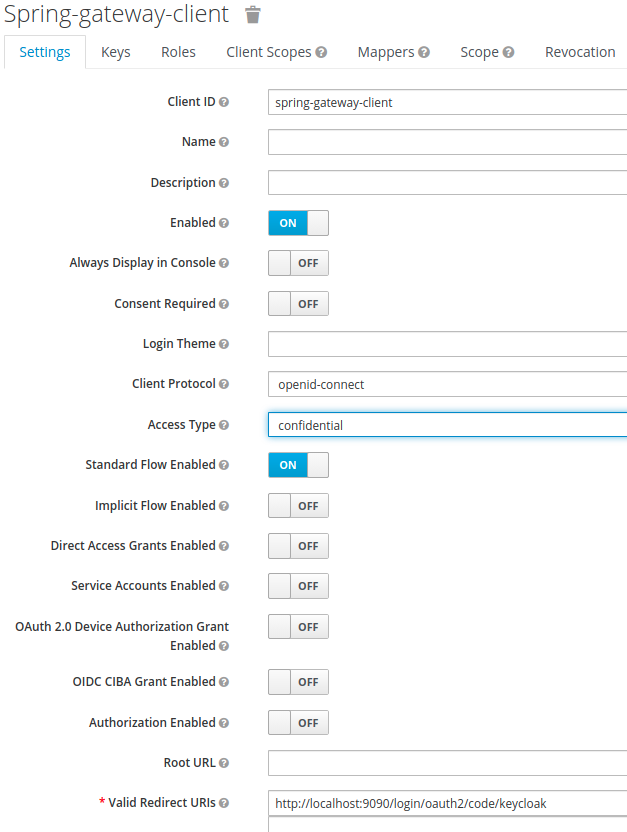
Once you, hit save, you will get a new tab called “Credentials”. Go to the credentials section and note down the secret value. We would use this value to register this client in our application.


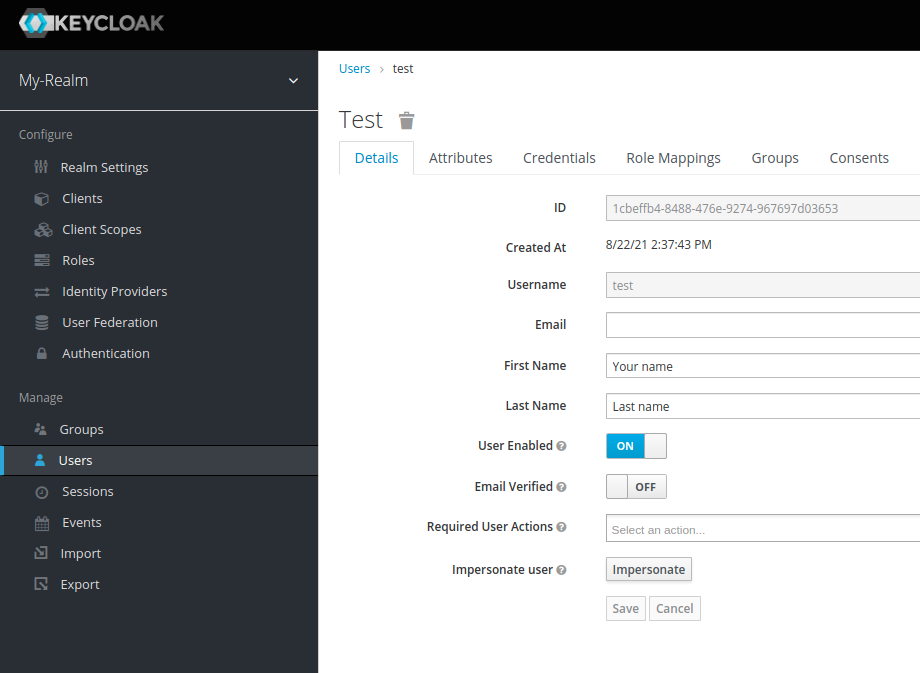
Next, Let's create a user with the username and password as “test”.
To do that, go to the “Users” section and click on “Add User”. Here I set the user name as “test”, first name as “Your name” and Lastname as “Last name”. Then on clicking save, we get an id generated for the User as seen in the image below. We will fetch this Id in our application after authenticating with Keycloak using OpenId Connect.

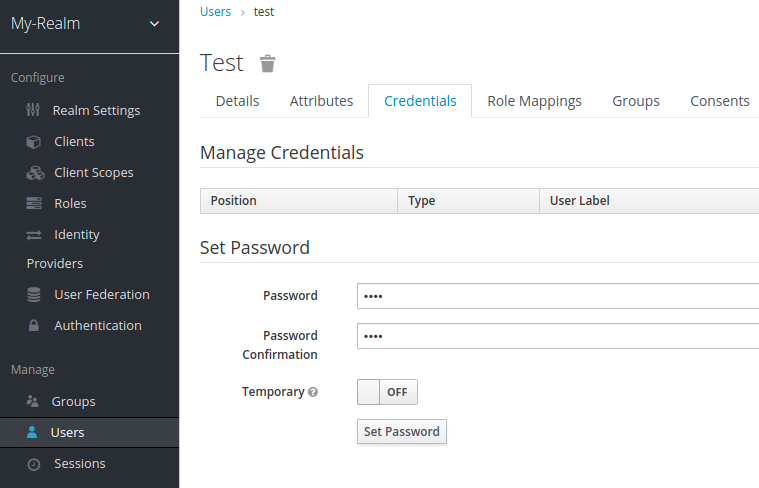
Next, Click on the “Credentials” tab and set a password as “test” with the “temporary” option turned off.

That's it. We have just created a realm with a client and a user. This is the most minimalistic configuration we have done that is enough to start integrating Keycloak with our application.
With this, let’s create our Spring Cloud Gateway application to integrate the Keycloak client that we just created.
Creating an Application with Spring Cloud Gateway
Let’s go to https://start.spring.io and create an application with the following dependencies.
- Gateway
- OAuth2 Client
Once you generate and download the application, we will create a simple RestController as follows:-
@RestController
public class Controller {

    @GetMapping("/")
    public String index(Principal principal) {
        return principal.getName();
    }
}
Here we are returning the name (Id of the Keycloak user) from the principal Object which is created by Spring security once the user logs in.
Now, let's protect this endpoint with a security configuration.
@Configuration
public class SecurityConfig {

   @Bean
   public SecurityWebFilterChain springSecurityFilterChain ( ServerHttpSecurity http) {

        http
            .authorizeExchange()
            .anyExchange()
            .authenticated()
         .and()
            .oauth2Login(); // to redirect to oauth2 login page.

      return http.build();
   }

}
Here, we set that, any request that comes in must be authenticated, and in the case of a not logged-in user, it should use the OAuth2 login page.
Next, We set the properties to register the Oauth2 Keycloak client in our application.
Setting Application Property values
This contains two parts. Setting the provider properties and registering the client information properties.
- Provider’s properties — The provider of the OAuth2 mechanism i.e the realm.
- Client properties — These are the properties of the Keycloak client to communicate with the realm.
Setting Provider Properties
To set the provider, we need the issuer-URI. For this, you need to go back to your realm setting section and under the “General” tab, you have endpoints. Click on the “OpenId Endpoint Configuration” link and you should get a JSON, containing all the required information. E.g, for the realm we just created, here is a small snippet of the output.

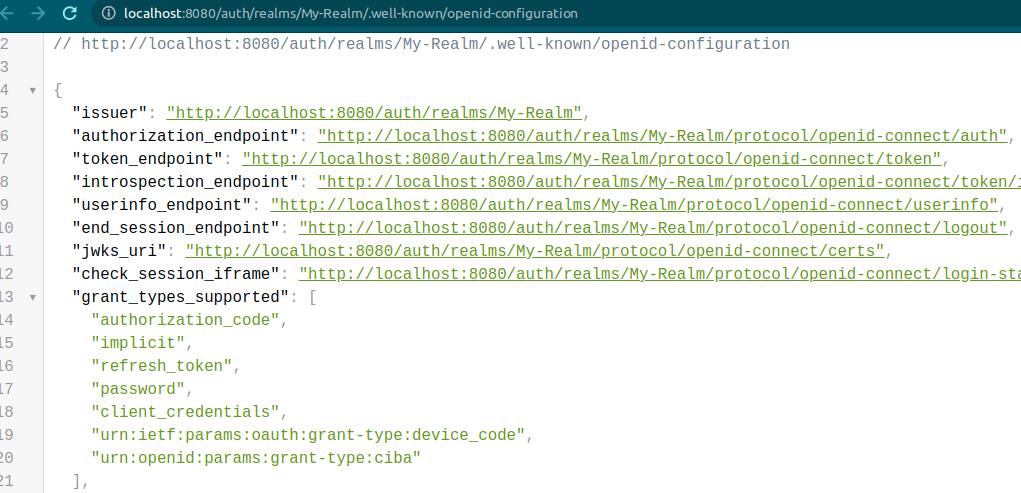
You then set the issuer URI for a provider name called “my-keycloak-provider” like the following.
spring:
  security:
    oauth2:
      client:
        provider:
          my-keycloak-provider:
            issuer-uri: http://localhost:8080/auth/realms/My-Realm
Note: The provider name can be a custom value, but you need to use this exact name while using it in the client registration properties.
Setting Client Registration Properties
Next, we will set the client registration properties under the registration name “keycloak-spring-gateway-client”.
spring:
  security:
    oauth2:
      client:
        provider:
          my-keycloak-provider:
            issuer-uri: http://localhost:8080/auth/realms/My-Realm
        registration:
          keycloak-spring-gateway-client:
            provider: my-keycloak-provider
            client-id: spring-gateway-client
            client-secret: fc36fd82-7042-4287-aef0-e9f8603abd02
            authorization-grant-type: authorization_code
            redirect-uri: '{baseUrl}/login/oauth2/code/keycloak'
server:
  port: 9090
Note: The client registration name can be any custom name. It is used to just identify the client in your application.
Here, we set the client Id we created in Keycloak and the client secret from the client’s “credentials” tab in Keycloak. We also set the provider name, from the properties before, and the redirect URI which we had registered while creating the client in the Keycloak. Also, Since we will be using the authorization code grant type for the OAuth2 flow, we set the authorization grant type to “authorization_code”.
With all the configuration done, Let’s start the application.
Starting the application
Since we set server.port=9090, the application starts at 9090. When we open http://localhost:9090 on the web browser, It immediately redirects to the login page from Keycloak as we are querying the root resource /.

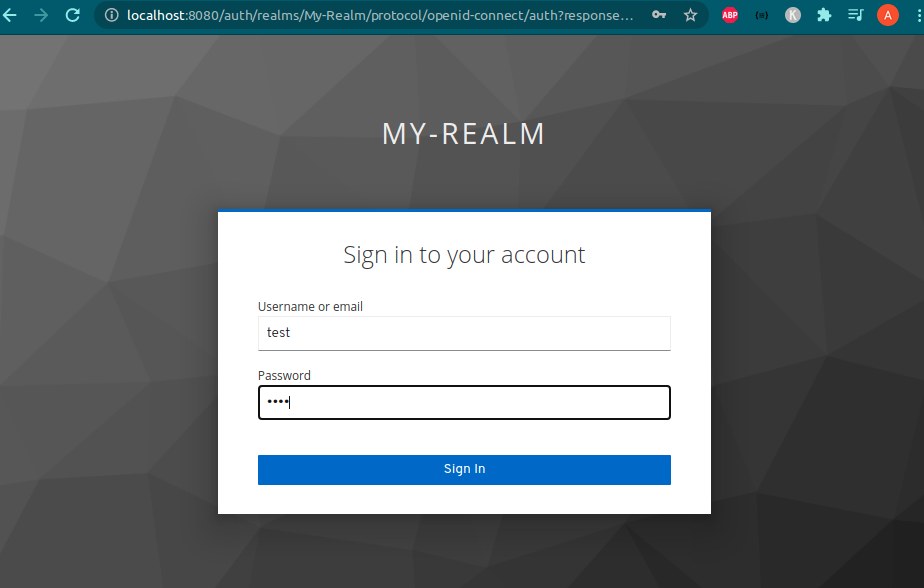
Here, enter the username and password “test” to log in. Since the authentication is now complete, The principal object is filled with the user details, and the user Id of the “test” user from Keycloak is returned.

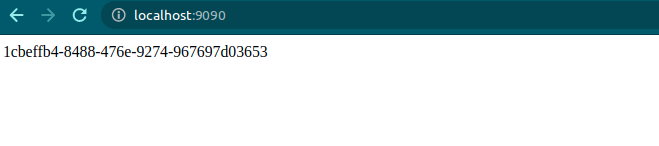
This is the same Id that was generated by Keycloak when we created the user.
Understanding the OAuth2 Open ID Connect Flow
In the diagram below, I have summarised the flow of how the OAuth2 Connect ID flow works. It starts off with the user requesting a resource, then authenticates itself, and gets a response once he is identified.

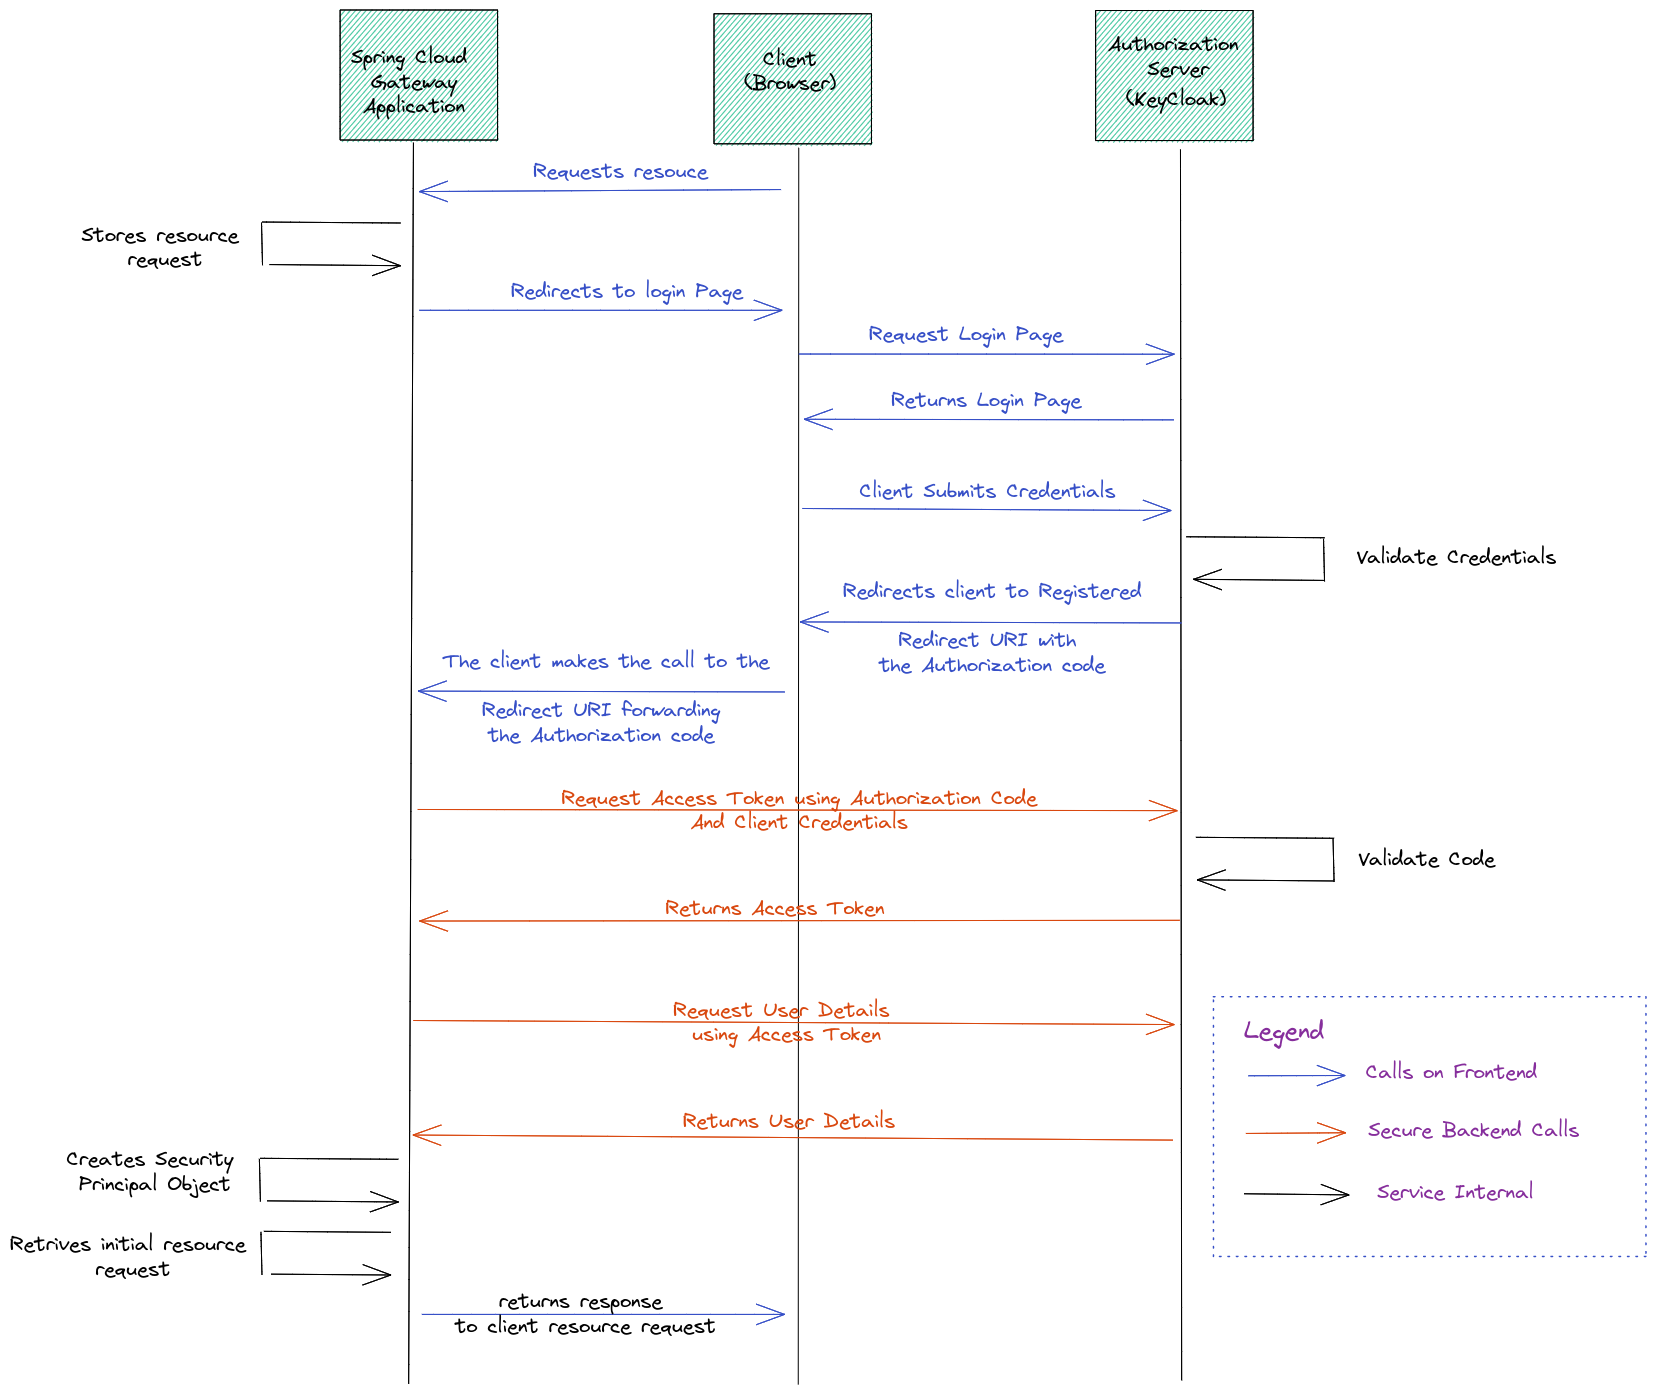
The OAuth2 flow is up to the request to get the access token. Once you get the access token, the application makes a request to get the user details. This part belongs to OpenId Connect to get the identity of the user.
Conclusion
So with this, we were able to integrate the Spring Cloud Gateway with Keycloak and set up OAuth2 OpenId Connect to authenticate the user.
I have uploaded the code integrating Keycloak on GitHub.
Wait... There is more to come up.
Next, we will integrate a backend service to this API Gateway as an OAuth2 resource server and check the user for authorization. This will be my next article here.
So, subscribe to my newsletter and also follow me on Twitter to know once it’s published.
Enjoy!!