
- Published on
How to Create A Cryptocurrency Token Using Smart Contract

- Authors
- Name
- Amrut Prabhu
- @amrutprabhu42

In this article, we will be creating an Ethereum based cryptocurrency token using a smart contract and deploy it to a blockchain network.
Introduction
I was a little curious about the raise of Web3 and wanted to know more about it. With the growing chatter about NFTs, Web3 made me curious to explore it, and here are the things I found while I created my own cryptocurrency token.
Before we get started let's look at What is Ethereum?
Ethereum
Ethereum was founded in 2015 with the intention to allow something more than just a blockchain-based cryptocurrency. It was to allow the blockchain-based distributed applications to be created that would work on the Ethereum network. The Ethereum network had its own cryptocurrency which is called Ether (ETH) and distributed applications that run on this Ethereum network are called Dapps. You can read more about this in this article
So in this article, we will create a new token that is based on the ERC-20 token standard. It is the most widely used token standard which defines the rules for implementing Ethereum based tokens. These tokens can be brought, sold, and traded over the Ethereum network.
With this let's get started.
Creating A Smart Contract
Now, what is a Smart Contract?
It's a self-executing program that is stored in the blockchain. This program is like an agreement between a buyer and seller which is written in lines of code.
To create this smart contract we are going to make use of a tool called truffle.
You can install this using the command
npm install -g truffle
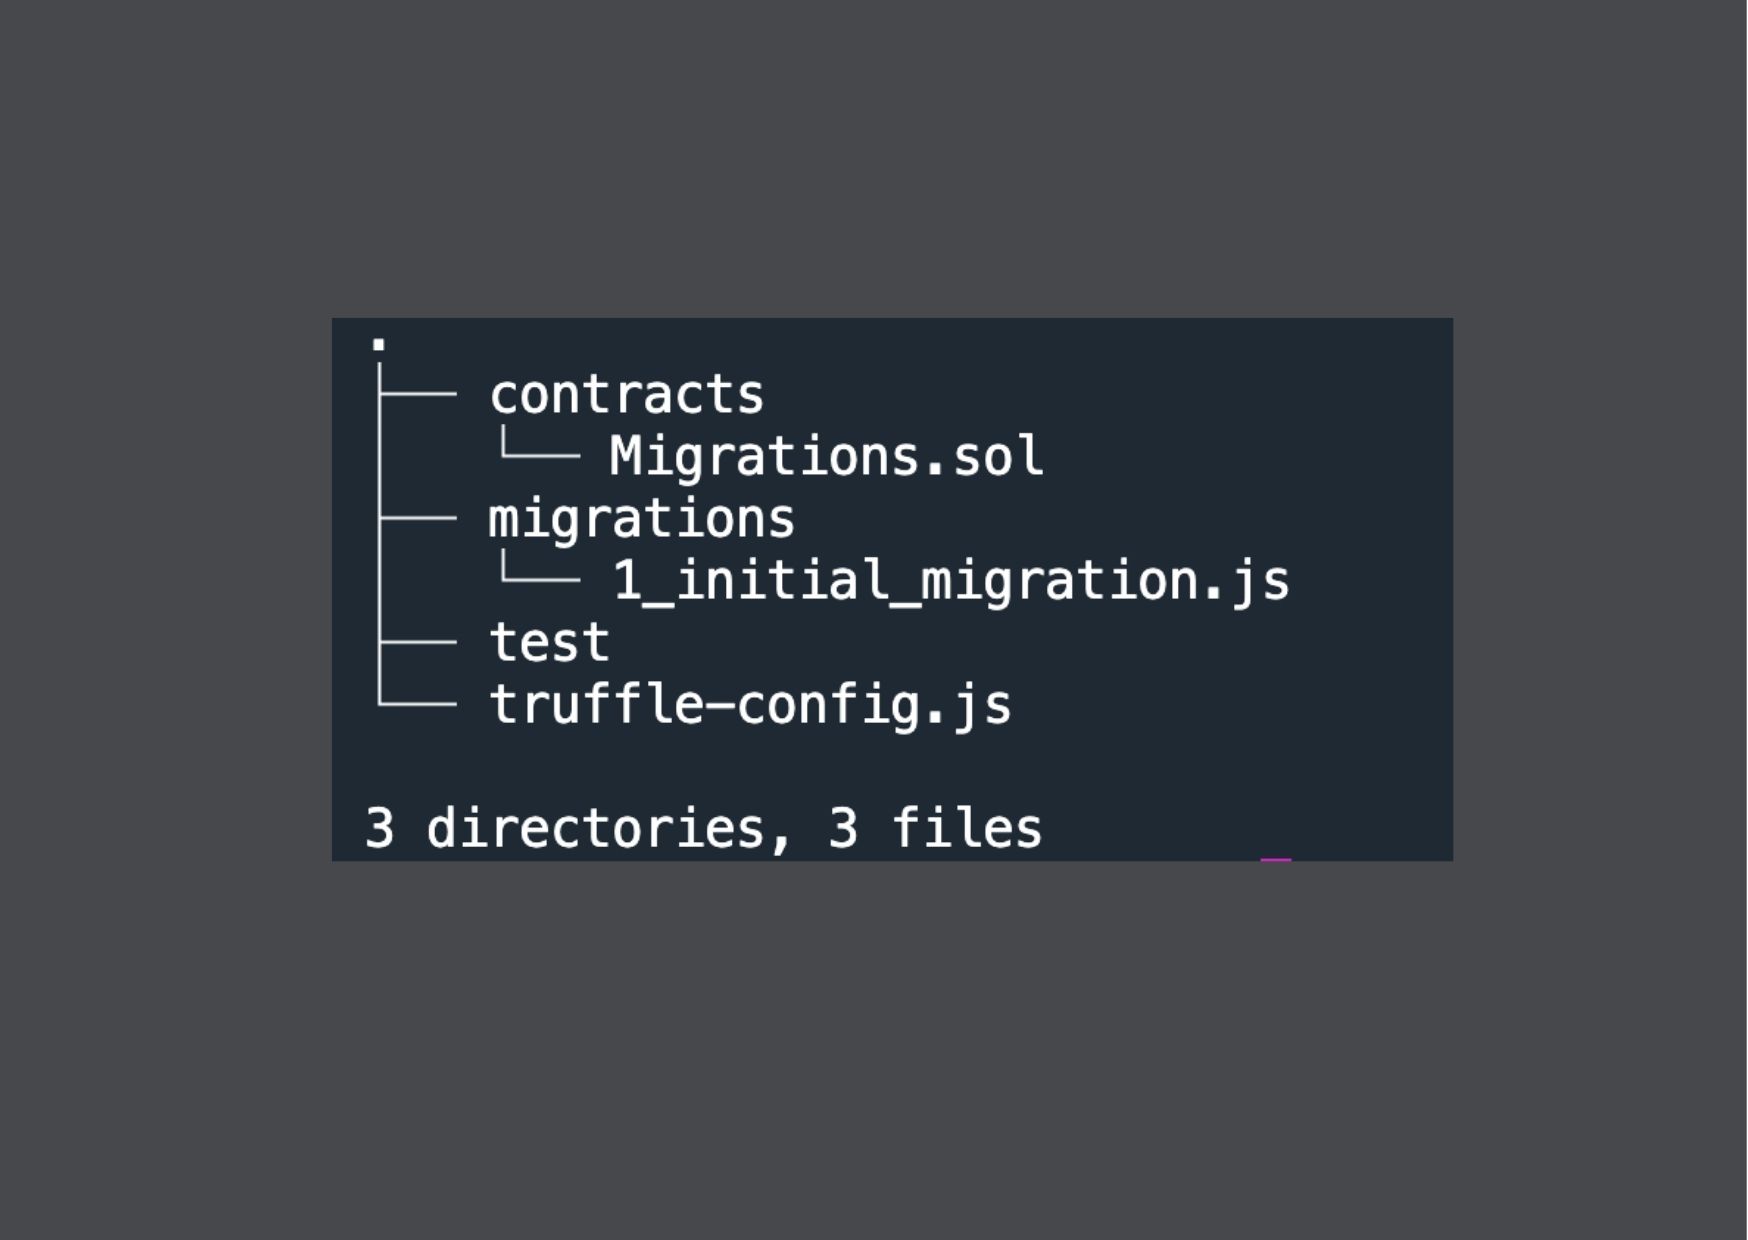
Once you install the tool, You can create a blank contract using the command
truffle init
This will create a structure of folders as below.

Now in the contracts folder let's create our first contract.
Since we are creating a contract for a token that is based on the ERC-20 contract, we need to get this base implementation. This is available in the OpenZeppelin Contracts on Github.
So let's install this using the following command.
npm install @openzeppelin/contracts
Smart Contracts are written using Solidity language and have the file extension .sol. Let’s extend the ERC-20 contract to create our own contract called NiceToken.
pragma solidity ^0.8.2;

import "@openzeppelin/contracts/token/ERC20/ERC20.sol";

contract NiceToken is ERC20 {

    constructor() ERC20("Nice Coin", "NICE") {}

   function mint(address account, uint256 amount) public {
       _mint(account, amount);
    }

}
It's a simple contract just extending the ERC-20 contract wherein we specify the name of our token and the symbol for our token.
With this, let’s compile this with truffle.
truffle compile
This will then pull the solc command based on the version defined in the truffle-config.js
Next, let's now deploy this to the Ethereum blockchain.
Setup Local Blockchain Network
Instead of using the real Ethereum network, we will run our own blockchain network on our own system using a tool called Ganache.
Once you download the tool for your platform, run it and select the quick start option. This will create a Blockchain network with a few accounts.


The network will be accessible at “http://localhost:7545” as an RPC server. Now for Truffle to connect to this network, we will add the following config to the truffle-config.js
module.exports = {
  networks: {
     development: {
       host: "127.0.0.1",
       port: 7545,
       network_id: "*",
   },

...
With this done, let’s create a migration script that will deploy the contract we created to the Ethereum Blockchain network.
Deploying the Smart Contract to the Blockchain.
To deploy the Smart Contract, we need to create a migration solidity file. Under the migrations folder, we will use the existing 1_initial_migration.js and add the following code to it.
const NiceToken = artifacts.require('NiceToken')

module.exports = async function (deployer) {
  await deployer.deploy(NiceToken)

  const niceToken = await NiceToken.deployed()

  // Mint 200 NiceToken for the first account
  await niceToken.mint('0x8D1be72BD7B79322D28C7185eB1346234c0a279b', '200000000000000000000')
}
This will deploy the contract and then create 200 tokens for the account with the address 0x8D1be72BD7B79322D28C7185eB1346234c0a279b.
Now you must be wondering, I am creating 200 tokens but why does it contain extra 18 zeros?
This is because the ECR-20 standard defines the token value with 18 zeros. You can see this in the ECR-20 specification here.
With this let's deploy the smart contract with the following command.
truffle migrate
Once it gets deployed, you will get the address where the contract was deployed in the blockchain network as shown in the output below.
1_initial_migration.js
======================

Deploying 'NiceToken'
   ---------------------
   > transaction hash:    0x6cc049dc4ba3a2b35f6964e7e4c25adc78a1e4c98a198397a8411fd706dc7a2d
   > Blocks: 0            Seconds: 0
   > contract address:    0xdE928AC7259340545Ed8Fa290588a8b0076Ff9F4
   > block number:        1
   > block timestamp:     1642949701
   > account:             0x8D1be72BD7B79322D28C7185eB1346234c0a279b
   > balance:             99.97412728
   > gas used:            1293636 (0x13bd44)
   > gas price:           20 gwei
   > value sent:          0 ETH
   > total cost:          0.02587272 ETH


   > Saving artifacts
   -------------------------------------
   > Total cost:          0.02587272 ETH
We will use this contract address in our application later.
So with this, we just deployed a smart contract.
Now when I look at Ganache, I see nothing changed, but a few Ether was reduced from the first account.
So where did the 200 NiceToken values go?
To visualize the tokens we are going to make use of a Cryptocurrency Wallet called MetaMask.
Visualizing Cryptocurrency In A Crypto Wallet
After installing MetaMask from here as a Chrome extension, we need to add the local blockchain network to the wallet settings. You can add a network to MetaMask settings as shown below.
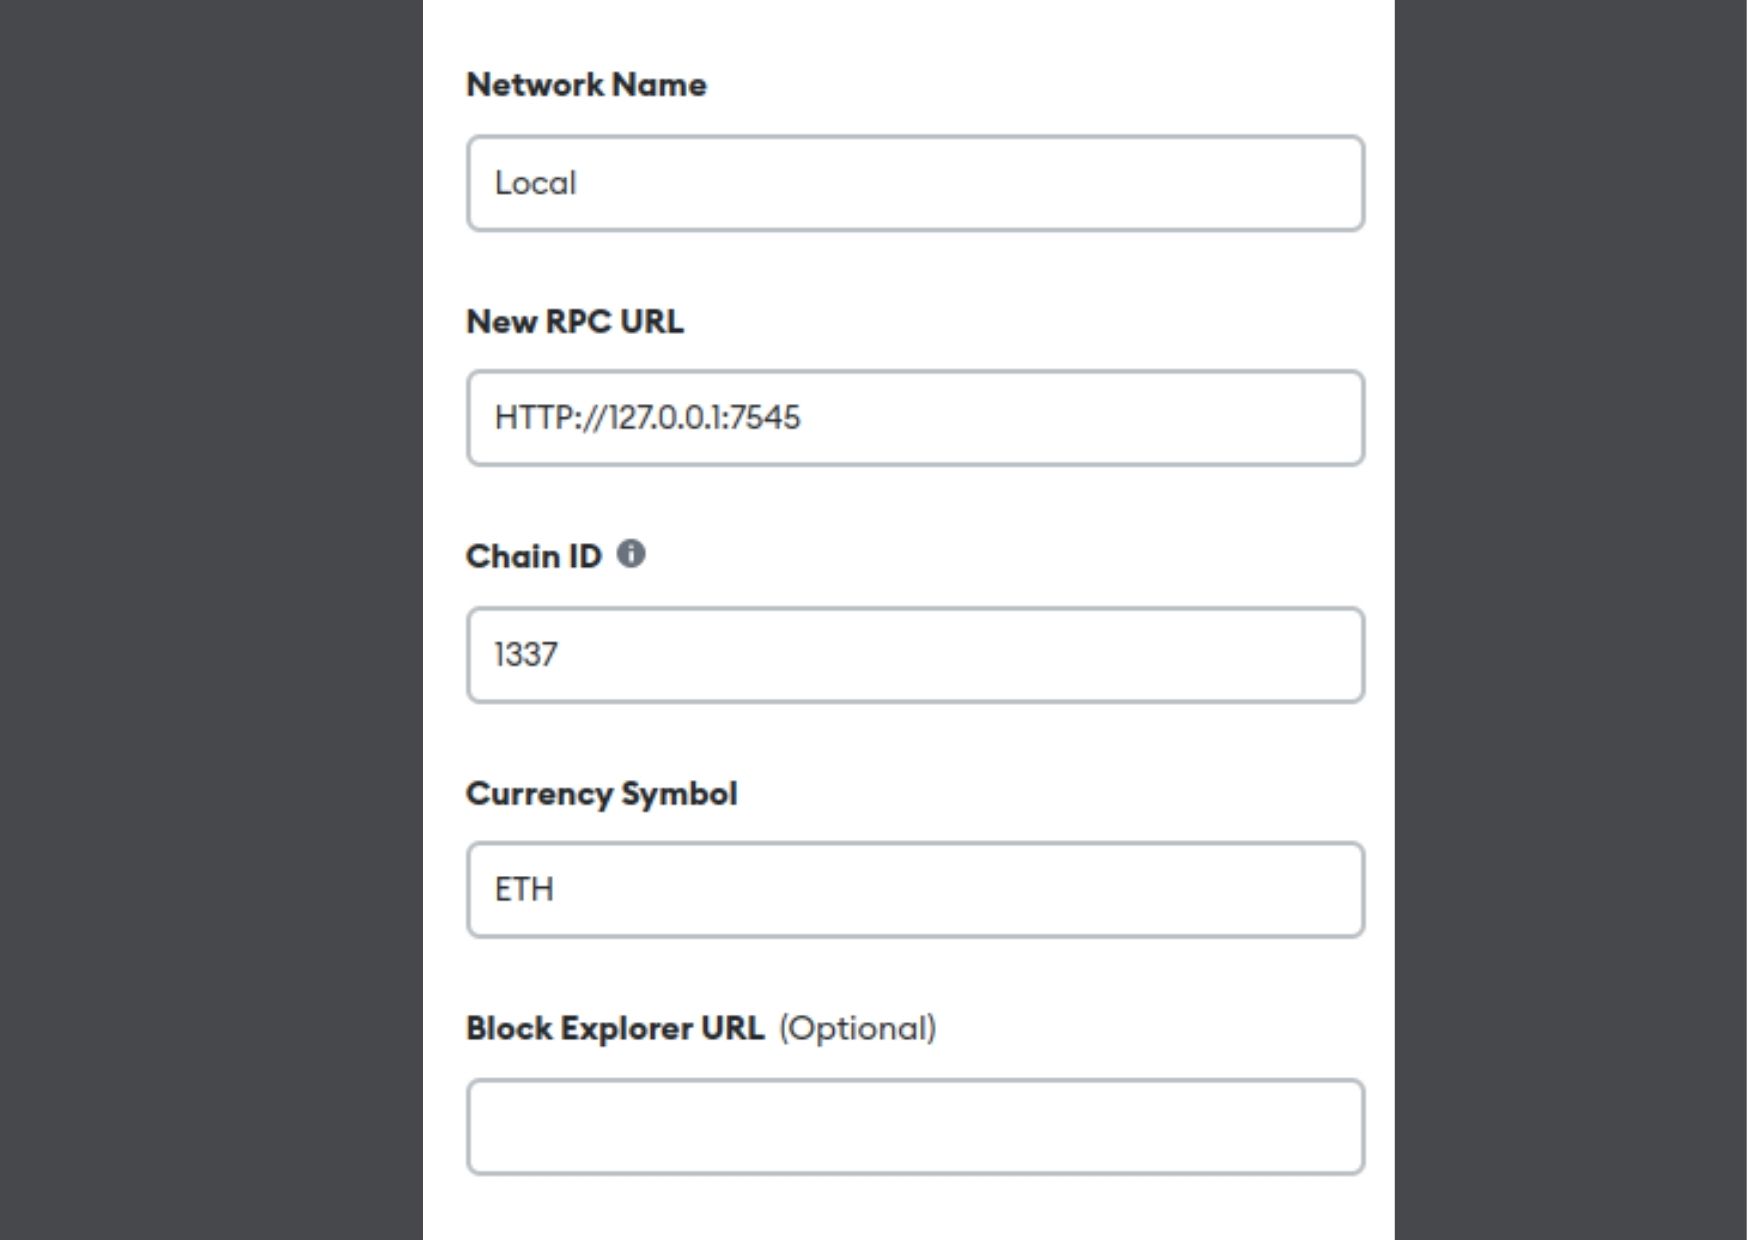
The Chain id is usually 1337 for the ganache tool.
Next, We need to import the account address with its private key. This can be located by clicking on the key icon next to the account address in Ganache.


Note: Never share your private key with anyone. Anyone with your private key can access your account. So "Never" share it and keep it secret.
Now, using this private key we will import the account into MetaMask Wallet.
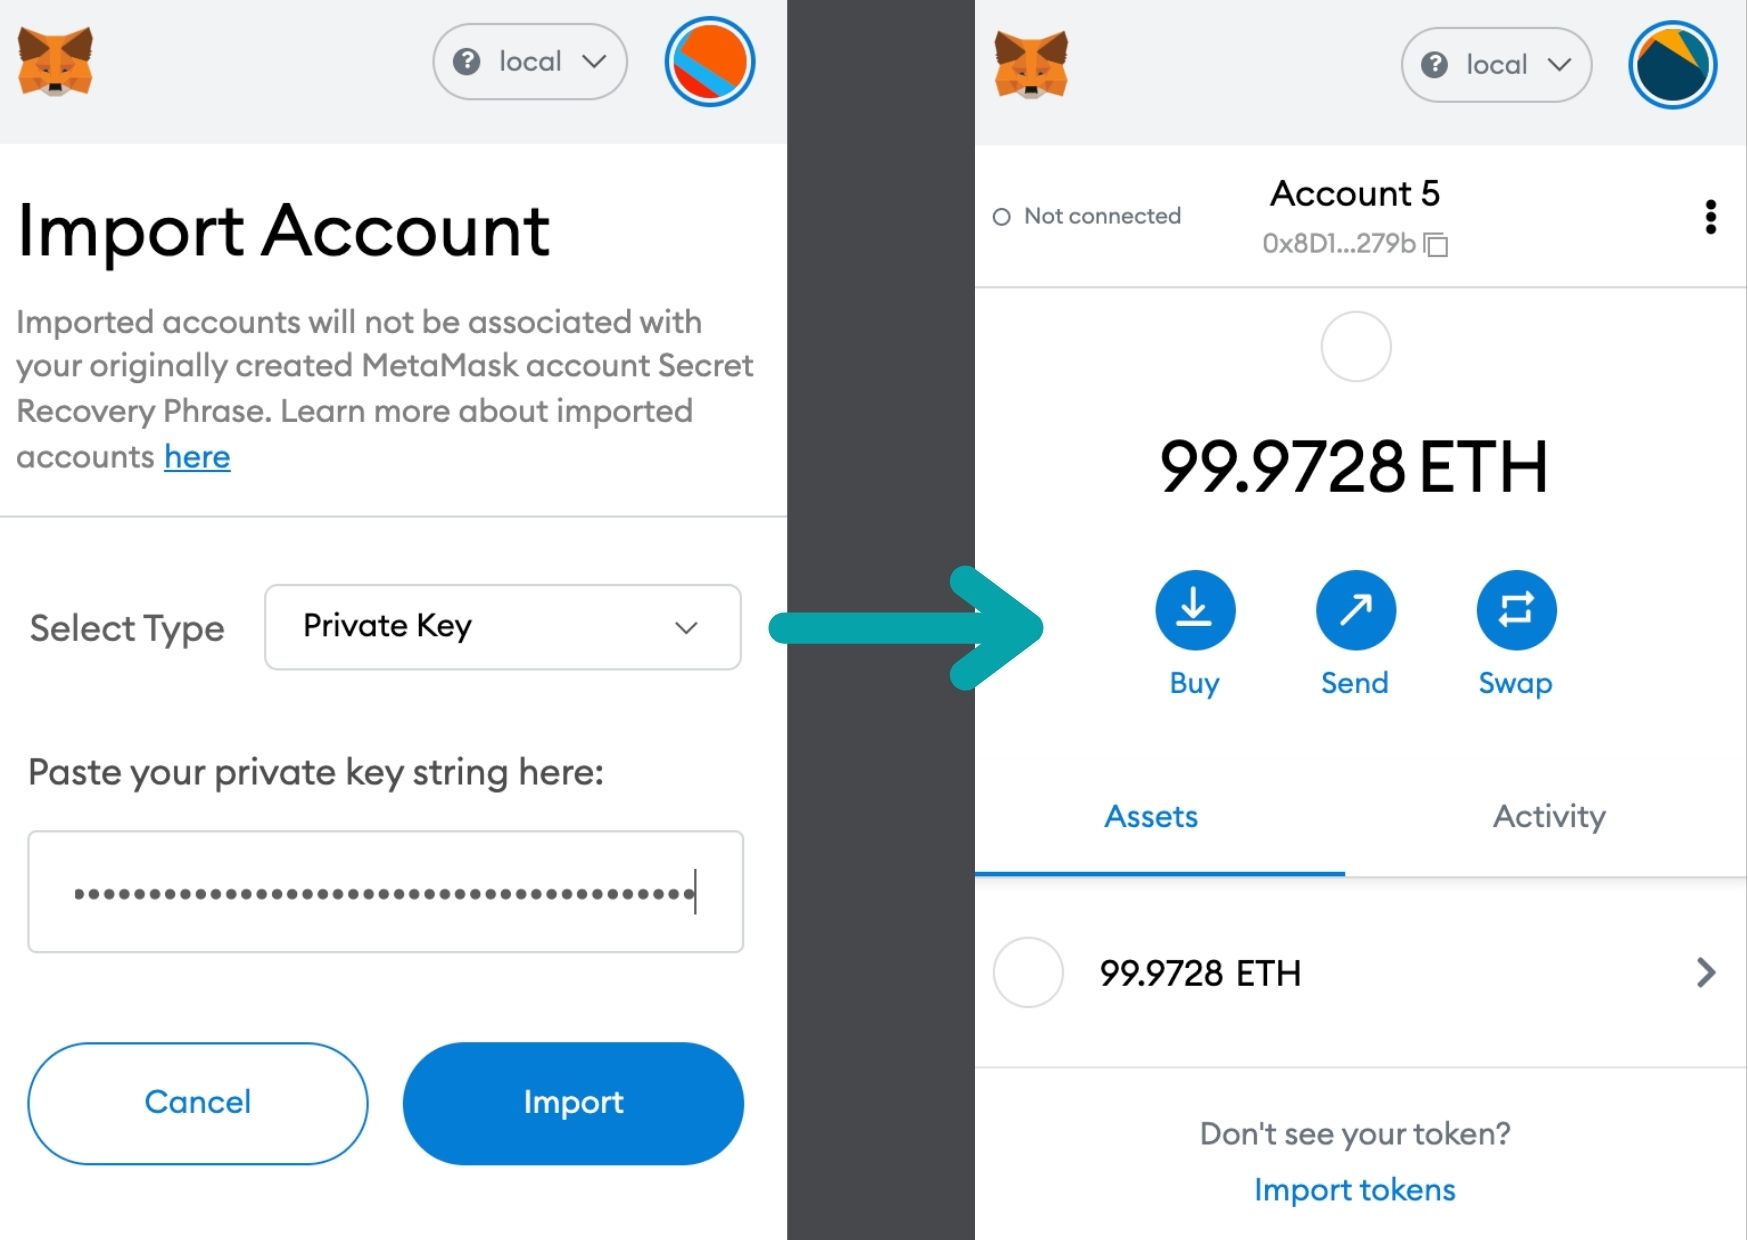
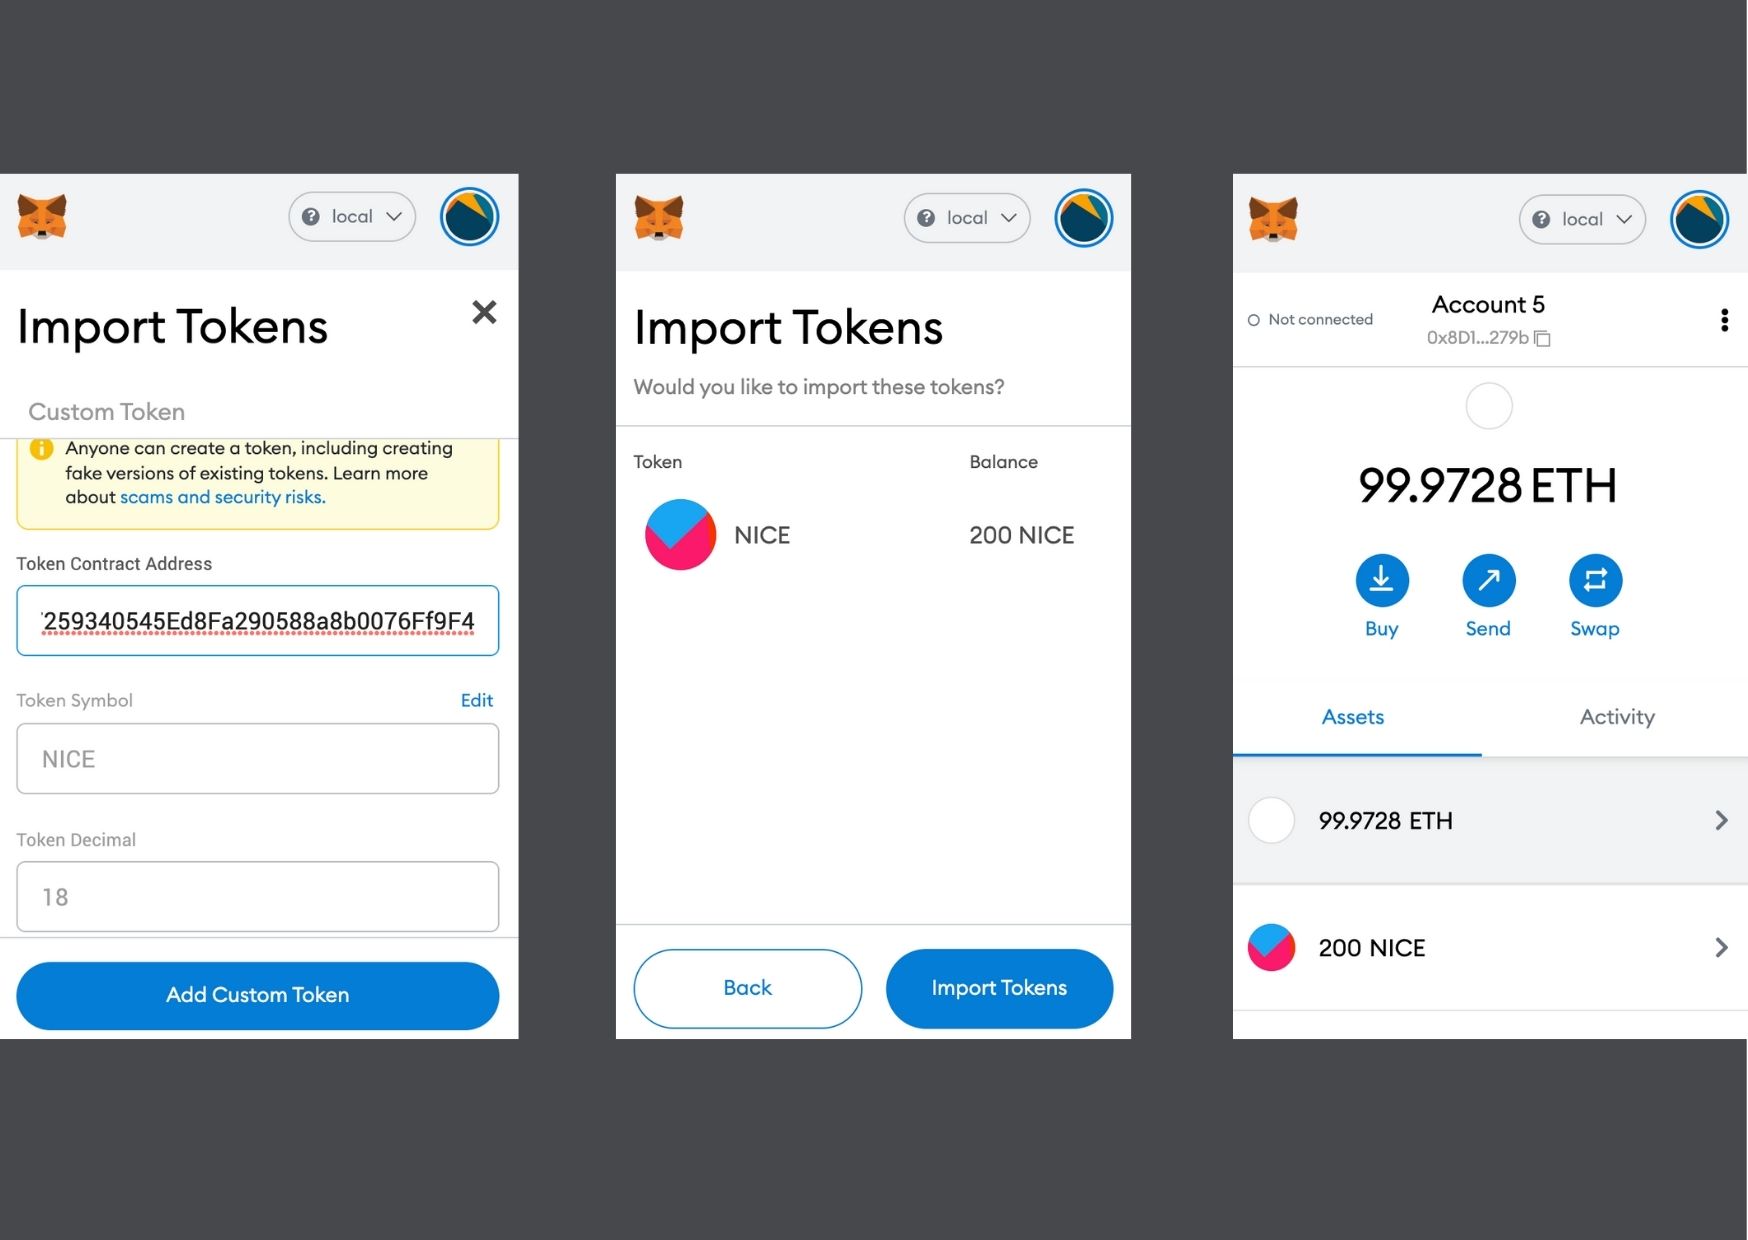
Once you import the account, You will see only the Ether (ETH) values.
To show the NiceTokens values, we will need to import the tokens by using the smart contract address.
For this, click on “Import tokens” and specify the Contract address i.e.0xdE928AC7259340545Ed8Fa290588a8b0076Ff9F4 that we obtained as an output while deploying the Smart Contract.
Conclusion
There we go, We achieved the following:-
- Created a Smart Contract for a new ERC-20 Token called “Nice”.
- Deployed the Smart Contract to a local blockchain network.
- Minted some tokens for an account.
- Connected the local blockchain network to MetaMask Crypto Wallet.
- Visualized the token balance using MetaMask Crypto Wallet for an account.
In my next article here, we will look into how we can create our own Cryptocurrency Wallet to send and receive tokens from one account to another using Web3.
As usual, I have uploaded the code on GitHub.
I keep exploring and learning new things. If you want to know the latest trends and improve your software development skills, then subscribe to my newsletter below and also follow me on Twitter.
Enjoy!!