
- Published on
Spring Cloud Stream With Kafka

- Authors
- Name
- Amrut Prabhu
- @amrutprabhu42

In this article, we will be looking into how we can communicate with Kafka Cluster using Spring Cloud Stream.
Introduction
Spring Cloud Stream, is a mechanism by which you can decouple the implementation of your producers and consumers from the type of messaging infrastructure you want to use. This allows us to keep our consumers and producers to be broker agnostic and we can easily switch to a different kind of broker by changing the binder implementation.
There are quite many binder implementations like e.g Kafka, RabbitMQ, AWS SNS, AWS SQS, etc. You can find a list of available binder implementations here.
Today we would be using the Kafka Binder to communicate with Kafka.
Creating a Producer and Consumer
Let’s go to https://start.spring.io and create an application with the spring cloud streams dependency.
Once you generate the project, You will have to add the Kafka Binder dependency as follows
<dependency>
  <groupId>org.springframework.cloud</groupId>
  <artifactId>spring-cloud-stream-binder-kafka</artifactId>
</dependency>
Now, to create a producer and consumer we only need to create beans with a supplier and a consumer as below.
@Bean
public Supplier<Message> producer() {
    return () -> new Message(" jack from Streams");
}

@Bean
public Consumer<Message> consumer() {
    return message -> System.out.println("received " + message);
}
That’s all. You just created a producer and a consumer. Now, this is a functional programming way to create a producer and a consumer to send and receive messages.
Now, let’s look at how to configure this to send and receive messages to and from the right destination. In our case, since we are using Kafka, the destination is a Kafka topic name.
spring:
  cloud:
    function:
      definition: consumer;producer
    stream:
      bindings:
        producer-out-0:
          destination: first-topic
        consumer-in-0:
          destination: first-topic
Since we used the functional programming way for defining the producer and the consumer, the binder names need to be of a particular format.
consumer : <functionName> + -in- + <index>
producer : <functionName> + -out- + <index>
Here the in refers to the consumer and out refers to the producer. The index is an index of the binder and is typically set to 0. You can read more about the binder naming convention here
It's understandable that for a consumer, it just can be a consumer function definition, as it would be invoked when there is a message in the topic.
But what about the producer which is the supplier function? Who invokes that?In this case, the supplier function is invoked by a default polling mechanism which is provided by the framework. It calls the supplier every second.
Now what about the case where you want to send a message after doing something? Probably you want to store your entity in the database and then send out an event. Let’s look at that next.
Sending Messages on Demand
To send a message on-demand is pretty simple. We need to use StreamBridge , to send a message as follows.
@Component
public class KafkaProducer {

    @Autowired
    private StreamBridge streamBridge;

    @Scheduled(cron = "*/2 * * * * *")
    public void sendMessage(){
        streamBridge.send("producer-out-0",new Message(" jack from Stream bridge"));
    }
}
Here I have used the stream bridge to send messages, which is currently sending messages at an interval of 2 sec.
Now, since we are using the Kafka binder, we need to provide properties to the binder in order to send messages to the right broker and also set the serializer and deserializer. Let's look at those configs.
Kafka Binder Properties
Now to configure the Kafka binder to send to the right broker, We have set the broker properties as follows.
spring:
  cloud:
    function:
      definition: consumer;producer
    stream:
      kafka:
        binder:
          brokers: localhost:9092

      bindings:
        producer-out-0:
          destination: first-topic
  consumer-in-0:
    destination: first-topic
Now, since we are using a custom class to send and receive messages, we need to create a custom serializer and deserializer as follows.
public class MessageSerializer implements Serializer<Message> {

    private final ObjectMapper objectMapper = new ObjectMapper();

    @Override
    public byte[] serialize(String topic, Message data) {
        try {
            return objectMapper.writeValueAsBytes(data);
        } catch (JsonProcessingException e) {
            throw new SerializationException(e);
        }

    }
}
public class MessageDeSerializer implements Deserializer<Message> {

    private final ObjectMapper objectMapper = new ObjectMapper();

    @Override
    public Message deserialize(String topic, byte[] data) {
        try {
            return objectMapper.readValue(new String(data), Message.class);
        } catch (IOException e) {
            throw new SerializationException(e);
        }
    }
}
Next, we need to configure the Kafka binder to use the above serializer and deserializer.
spring:
  cloud:
    function:
      definition: consumer;producer
    stream:
      kafka:
        bindings:
          producer-out-0:
            producer:
              configuration:
                value.serializer: com.amrut.prabhu.dto.coverters.MessageSerializer
          consumer-in-0:
            consumer:
              configuration:
                value.deserializer: com.amrut.prabhu.dto.coverters.MessageDeSerializer
        binder:
          brokers: localhost:9092

      bindings:
        producer-out-0:
          destination: first-topic
          producer:
            useNativeEncoding: true # Enables using the custom serializer
        consumer-in-0:
          destination: first-topic
          consumer:
            use-native-decoding: true # Enables using the custom deserializer
To use custom serializers, we need to set useNativeEncoding to true. Then you can set the serializer and the deserializer classes for each of the bindings under the Kafka binder section as shown above.
You can find all the supported properties that you provide to the Kafka binder in the org.springframework.cloud .stream.binder.kafka.properties .KafkaBindingProperties class.
With this let’s start the application with the following command.
java -jar \
target/spring-cloud-stream-kafka-communication-0.0.1-SNAPSHOT.jar

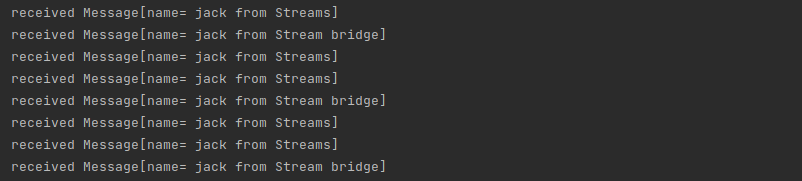
In the logs, you can see the consumer is getting messages from the producer which we created using functional programming, and the producer which is using the stream bridge to send the messages.
Conclusion
In this article, we saw how we can use Spring Cloud Streams to send and receive messages from a Kafka topic. We saw how we define the binders and then used the Kafka binder dependency to send messages to the Kafka broker.
As usual, I have uploaded the code on GitHub.
I keep exploring and learning new things. If you want to know the latest trends and improve your software development skills, then subscribe to my newsletter below and also follow me on Twitter.
Enjoy!!