
- Published on

- Authors
- Name
- Amrut Prabhu
- @amrutprabhu42

Introduction
Starting any Java application on AWS lambda incurs a significant amount of initialization time because the JVM has to start up and then load the application.
Now, if you want to use frameworks like SpringBoot which has its own initialization time, then the benefit of the Lambda function for executing quickly is lost. Hence AWS brought in a new feature called Snap Start during reinvent 2022 which will reduce these initialization times to very low numbers.
Today we will create a Lambda function using Terraform, deploy a Spring Boot application and look at its cold initialization time with the Snap Start option enabled.
How does Snap Start Option work?
When the Snap Start option is enabled, the published code is started and after initialization, a snapshot of the memory is taken and cached. This snapshot is then loaded for every fresh invocation of the Lambda function thereby eliminating the time during cold initialization.
Now let’s create our Spring Boot application to handle the lambda invocation requests.
Creating Spring Boot Application With Spring Cloud Function
Spring Cloud function provides an AWS adapter which makes writing AWS Lamda handlers easy. We just need to create a java.util.Function as a bean to handle incoming requests and return a response.
 @Bean
    public Function<String, String> toUpperCase() {
        return value -> value.toUpperCase();
    }
Here we define a simple handler bean, which takes a string and returns an upper case of the input string.
Now you can define more than one handler function in the code but you will have to specify which function bean will be called during the lambda invocation. You can specify this using the property spring.cloud.function.definition in the application properties file or you can specify the environment variable spring_cloud_function_definitionin your Lambda function with the name of the bean you want to invoke.
You can also dynamically call the required function via the API Gateway by providing the header spring.cloud.function.definition with the bean name, you intend to invoke.
To build the jar that will be uploaded to the Lambda function, we have to create it using a custom build.
To do this, we have to add the following configuration to our pom.xml file.
<build>
  <plugins>
   <plugin>
    <groupId>org.springframework.boot</groupId>
    <artifactId>spring-boot-maven-plugin</artifactId>
    <dependencies>
     <dependency>
      <groupId>org.springframework.boot.experimental</groupId>
      <artifactId>spring-boot-thin-layout</artifactId>
      <version>1.0.28.RELEASE</version>
     </dependency>
    </dependencies>
   </plugin>
   <plugin>
    <groupId>org.apache.maven.plugins</groupId>
    <artifactId>maven-shade-plugin</artifactId>
    <configuration>
     <createDependencyReducedPom>false</createDependencyReducedPom>
     <shadedArtifactAttached>true</shadedArtifactAttached>
     <shadedClassifierName>aws</shadedClassifierName>
    </configuration>
   </plugin>
  </plugins>
 </build>
When you build your application, you will get a jar with -aws . We need to use this jar in our Lambda function.
With this, we are ready with our code, now let’s create our Lambda function using terraform.
Creating Lambda using Terraform
To create a Lambda function using Terraform we would have to add the following Lambda function resource.
resource "aws_lambda_function" "spring_boot_lambda" {
  function_name = "spring_boot_function"
  role          = aws_iam_role.lambda_iam_role.arn
  handler       = "org.springframework.cloud.function.adapter.aws.FunctionInvoker::handleRequest"
  memory_size   = 512
  s3_bucket     = "test-amrut-123"
  s3_key        = "content_types.zip"
  runtime       = "java11"
  package_type  = "Zip"
  timeout       = 15
  snap_start {
    apply_on    = "PublishedVersions"
  }
}
Here we are using the Spring Cloud function’s handler function to handle the incoming requests.
If you want to create an API Gateway invoking the lambda, you can find the entire code on my GitHub repo here.
With this, let's look at the cold start of a normal application without the Snap Start option enabled.

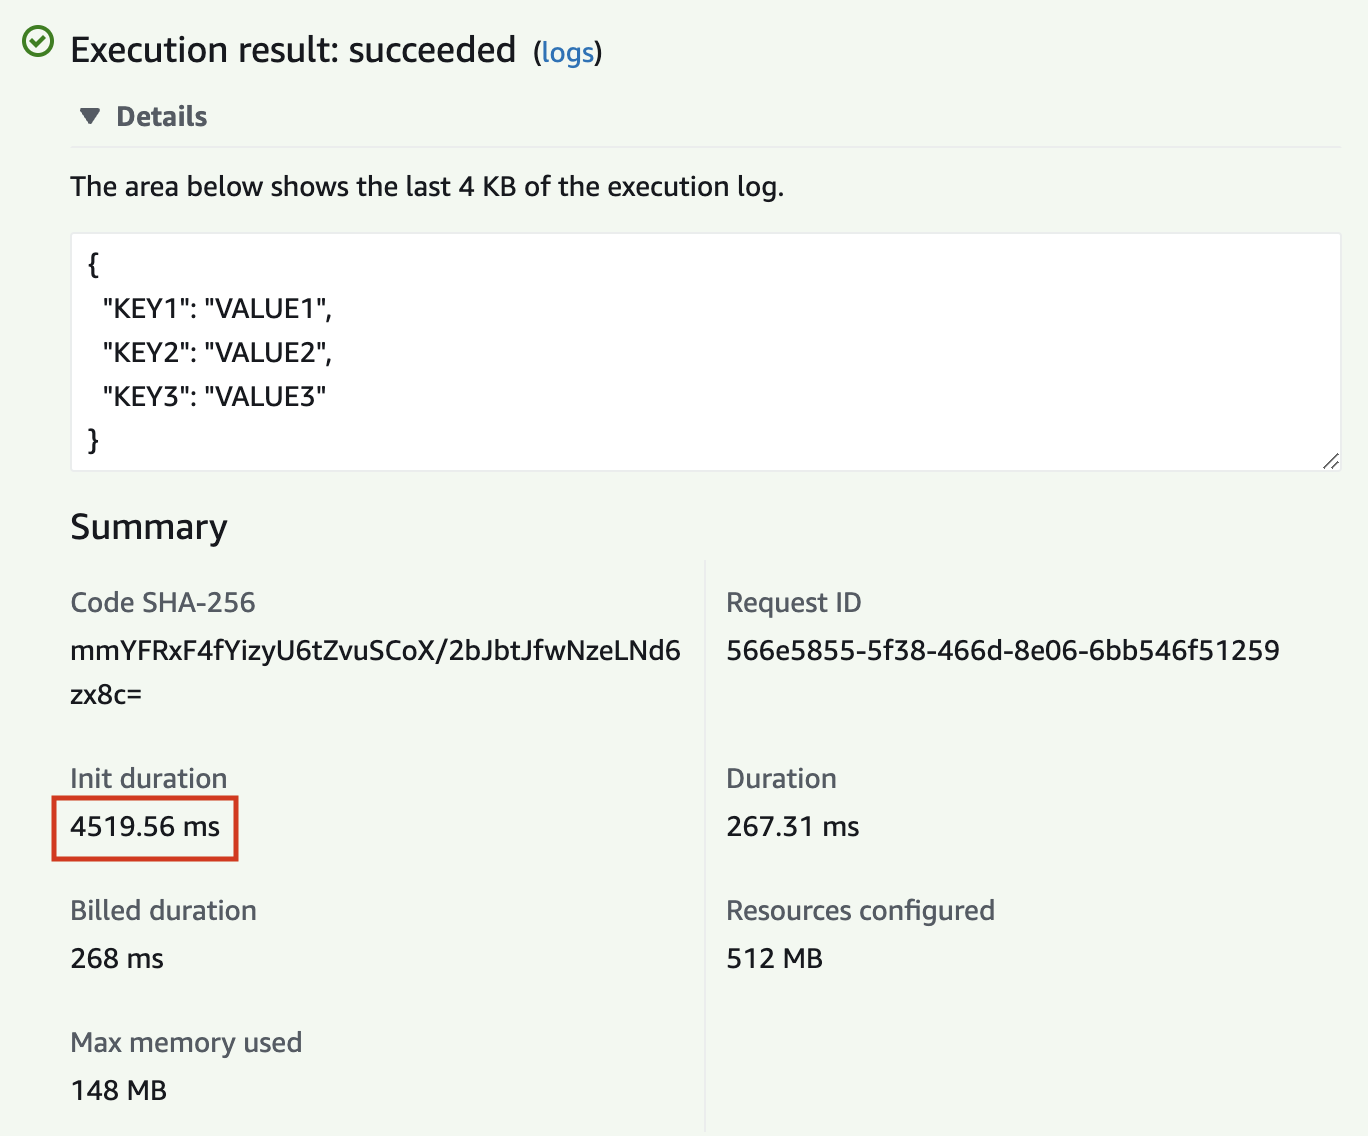
It takes nearly around 4500 ms just for initialization as shown above.
Now let's check the performance with the Snap Start option enabled.

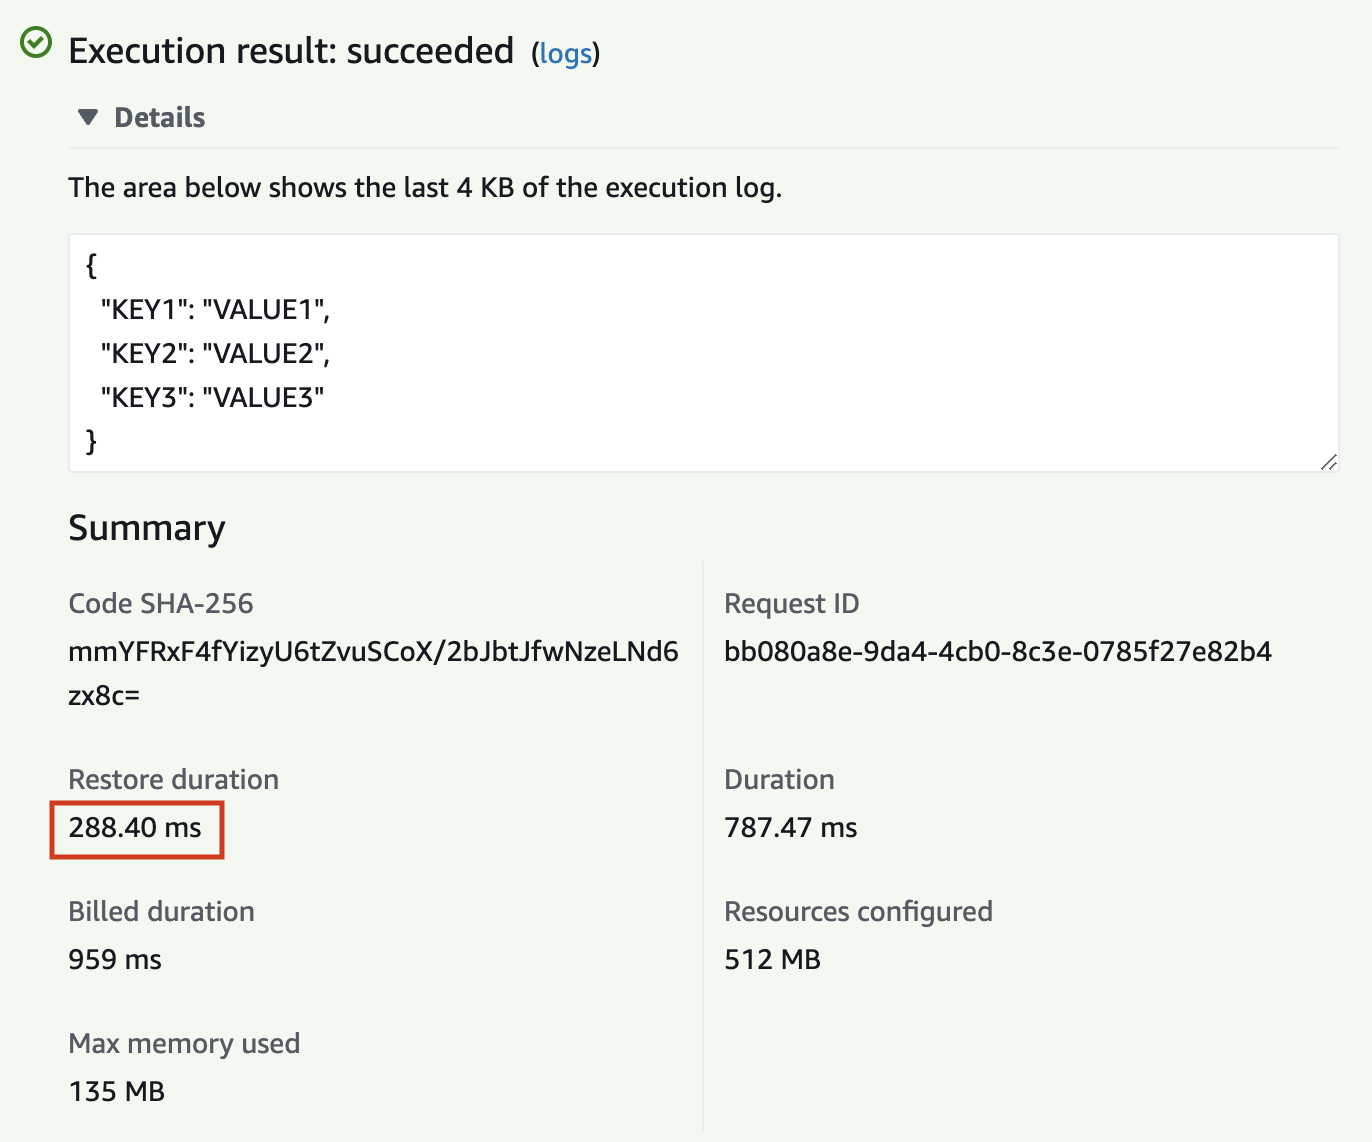
The restoration time, which replaces now the initialization time takes only around 288 ms during a cold start.
Conclusion
The Snap Start option has made it an even more compelling reason to use Java on AWS Lambda function. With such optimizations in place, Java is still competing very well with other Languages.
You can find the entire code on my GitHub repo here.
I keep exploring and learning new things. If you want to know the latest trends and improve your software development skills, then subscribe to my newsletter below and also follow me on Twitter.
Enjoy!!