
- Published on


- Authors
- Name
- Amrut Prabhu
- @amrutprabhu42

In this article, I would like to give you a jump-start tutorial to understand the basic concepts and create a workflow pipeline from scratch.
So let's get started!
Introduction
Apache Airflow is an orchestration tool that helps you to programmatically create and handle task execution into a single workflow. It then handles monitoring its progress and takes care of scheduling future workflows depending on the schedule defined.
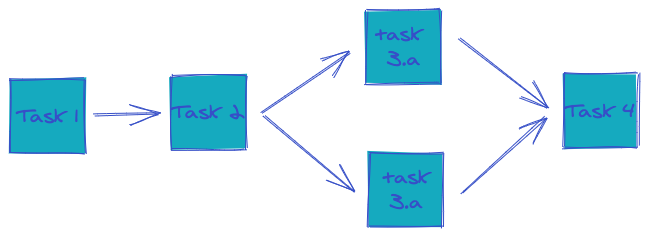
Workflows are created using Python scripts, which define how your tasks are executed. They are usually defined as Directed Acyclic Graphs(DAG).

The workflow execution is based on the schedule you provide, which is as per the Unix cron schedule format. Once you create Python scripts and place them in the dags folder of Airflow, Airflow will automatically create the workflow for you.
How difficult are the Python scripts?
Well, not difficult but pretty straightforward. Let me explain this.
Key Concepts
A workflow is made up of tasks and each task is an operator. Now, what is an operator? An operator is a Python class that does some work for you. These classes are provided by airflow itself. Some basic operators are
- BashOperator - used to run bash commands.
- PythonOperator - used to run a Python function you define.
- BranchOperator - used to create a branch in the workflow.
- DummyOperator - used to represent a dummy task.
There are quite a few other operators that will help you make an HTTP call, connect to a Postgres instance, connect to Slack, etc. You can find more operators here.
Finally, with the theory done, Let’s do something exciting i.e. create our first Airflow DAG.
Creating an Airflow DAG.
As an example, Let's create a workflow that does the following
- Check if the URL is available
- Fetches some data from an URL
- Extract certain fields from it.
- Print the extracted fields using the bash echo command.


Pretty simple workflow, But there are some useful concepts that I will explain as we go.
So let's start.
Running Apache Airflow with Docker
The official Airflow site provides a docker-compose file with all the components needed to run Airflow. Once you download the docker-compose file, You can start it using the docker-compose command.
docker-compose up -d
Once your containers are up and running, adags folder is created on your local machine where you placed the docker-compose.yml file. We are going to use this dags folder to place our Python workflows. You can access the Airflow web UI using the URL localhost:8080
Creating your DAG Definition
First, we will create a skeleton of the workflow, i.e, in this case, is the DAG definition.
from airflow.models import DAG

default_args = {
    'start_date': datetime(2020, 1, 1)
}
with DAG('user_processing',
         schedule_interval='@daily',
         default_args=default_args,
         catchup=False) as dag:
With this, you just created a new workflow, But without any tasks to be executed. The first parameter is the name of the DAG, followed by the schedule you want it to be triggered. Then you set some default arguments like start_datetelling when actually the DAG can start to trigger.
Next, let's create our first task.
Now, to check if our URL is reachable, we are going to use a sensor operator. In this case, it's an HttpSensor operator.
...
with DAG('user_content_processing',
schedule_interval='@daily',
default_args=default_args) as dag:
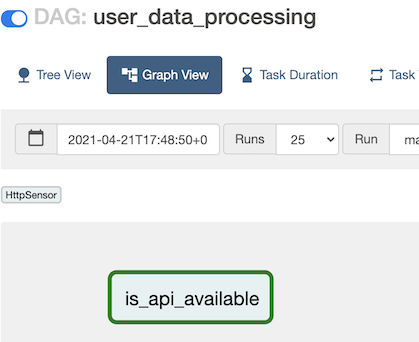
is_api_available = HttpSensor(
task_id='is_api_available',
http_conn_id='user_api',
endpoint='api/'
)
To create the HttpSensor operator, we provide it with a task id, HTTP connection id, and endpoint. The task id identifies the task in the DAG, and the endpoint identifies the API to fetch. Now the third parameter i.e http_conn_id will require something to be explained.
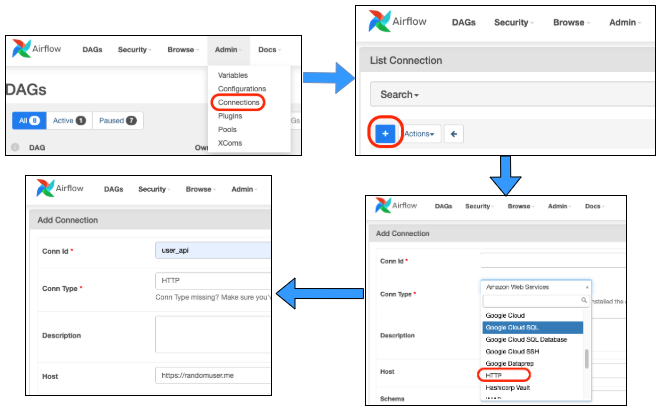
Airflow provides a mechanism to create and store some configurations that you can use across workflows. One such type is configuring “Connections”. Here you can provide various connections like AWS connections, ElasticSearch connections, Kubernetes cluster connections, etc.
In our case, we would be using the HTTP connection option. Here we would provide the URL we want to trigger and set the connection id to user_api .We want to call the URL https://randomuser.me/api/, which will return a JSON response of some random user information.

Finally, with this configured, the task is ready to make a call to the URL with the endpoint provided.
So with that, we just created our first task and learned some concepts.

Now, once the first task execution succeeds, we want to execute the task that will make the actual call to get user details. For this, we are going to make use of an HttpOperator called SimpleHttpOperator.
is_api_available = HttpSensor(
    ...
)

extracting_user = SimpleHttpOperator(
    task_id='extracting_user',
    http_conn_id='user_api',
    endpoint='api/',
    method='GET'
)
As you can see, we have the task_idto identify this task, the http_conn_id we spoke about before, the endpoint, and the method you want to execute.
That's it!
Now you must be wondering what happens to the response. For this let's look into another concept called Xcoms
Xcoms
Xcoms is a way you can share data between your tasks. It basically stores key-value pairs of the information you want to store that can be accessed by other tasks in a DAG.
The SimpleHttpOperator stores the response inside these Xcoms. Hence we will use another task to retrieve the value and process it. You can read more about Xcoms here
Once the data is fetched, We are going to create a processor, which will process the data that was pushed into Xcoms by the previous task. We will do this using a Python function and hence the new operator that we are going to use is the PythonOperator.
fetch_user = SimpleHttpOperator(
    ...
)

processing_user = PythonOperator(
    task_id='processing_user',
    python_callable=_processing_user
)

The PythonOperator is a simple operator, that takes the task_id and a Python callable function. Let’s look at the function.
def _processing_user(ti):
    users_txt = ti.xcom_pull(task_ids=["extracting_user"])[0]
    users = json.loads(users_txt)

    if not len(users) or 'results' not in users:
        raise ValueError("User is empty")
    user = users['results'][0]
    user_map = {
        'firstname': user['name']['first'],
        'lastname': user['name']['last']
    }
    processed_user = json_normalize(user_map)
    Variable.set("user", processed_user)
So this function receives a Task Instance (referred as ti). We use this task instance to get the information that our task extracting_user has pushed to Xcoms, using xcom_pull call. We then validate the input and extract some fields as a dictionary. Finally, we normalize the dictionary and add it to something called Variables. Let’s look at what are Variables.
Variables
Variables are a way to store and extract some values that you would like to use across any DAG. It's basically a key-value store of arbitrary data. You can read more in detail about it here.
Now that we have stored the values inside Variables, let's print them to the logs using the echo command. To do this we are going to use the BashOperator
{% raw %}
processing_user = PythonOperator(
   ...
)
print_user = BashOperator(
    task_id='log_user',
    bash_command='echo "{{ var.value.user }}"'
)
{% endraw %}
In this, I will explain to you another important concept called Templating.
Templating
Airflow uses Jinja Templating. As you have seen in the code above, I have used curly braces which allow me to materialize some values. In this case, I have extracted the user key from Variables (using var ) which I had stored using the previous task.
Now how would you know if the particular operator supports templating? For this, you can search for “template_fields” in the API reference of the operator, Which will tell you which fields support templating. e.g You can have a look at the HttpSensor operator reference here.
Ordering Your Tasks
Now, With all of this, we have created all the tasks instances. But we still have to order the tasks. To do this, we make use of the << operator. You define it as
Task 1 << Task 2
This means Task 1 will run before Task 2. In our case, we will order this as
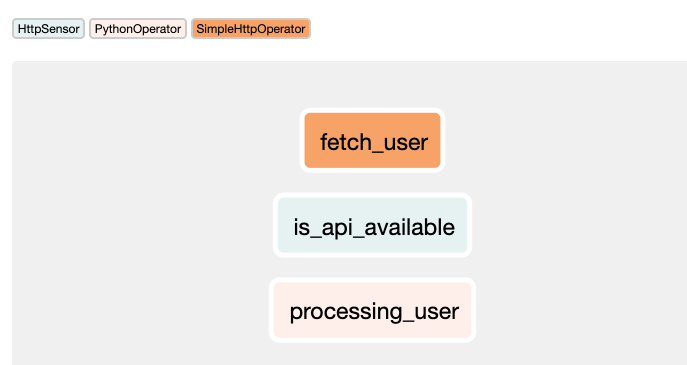
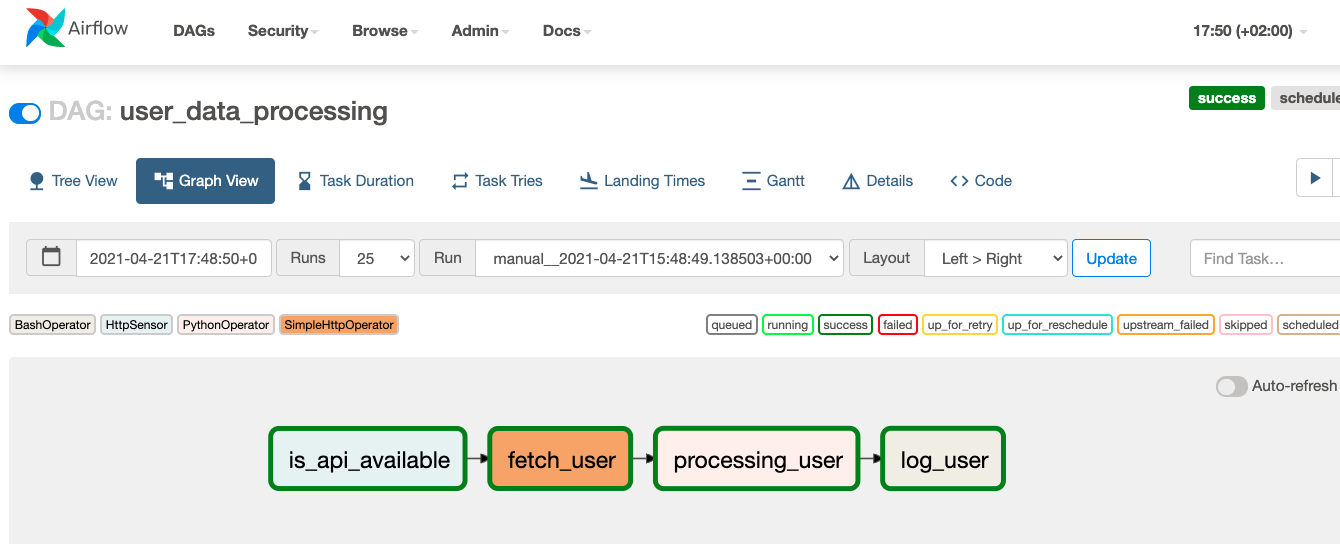
is_api_available >> fetch_user >> processing_user >> print_user
And there we go. We just created a simple Airflow DAG workflow from scratch covering some of the important concepts of Airflow. Now, enable the DAG and hit run. It will start executing.

As usual, I have uploaded the code on GitHub. :)
Enjoy!!